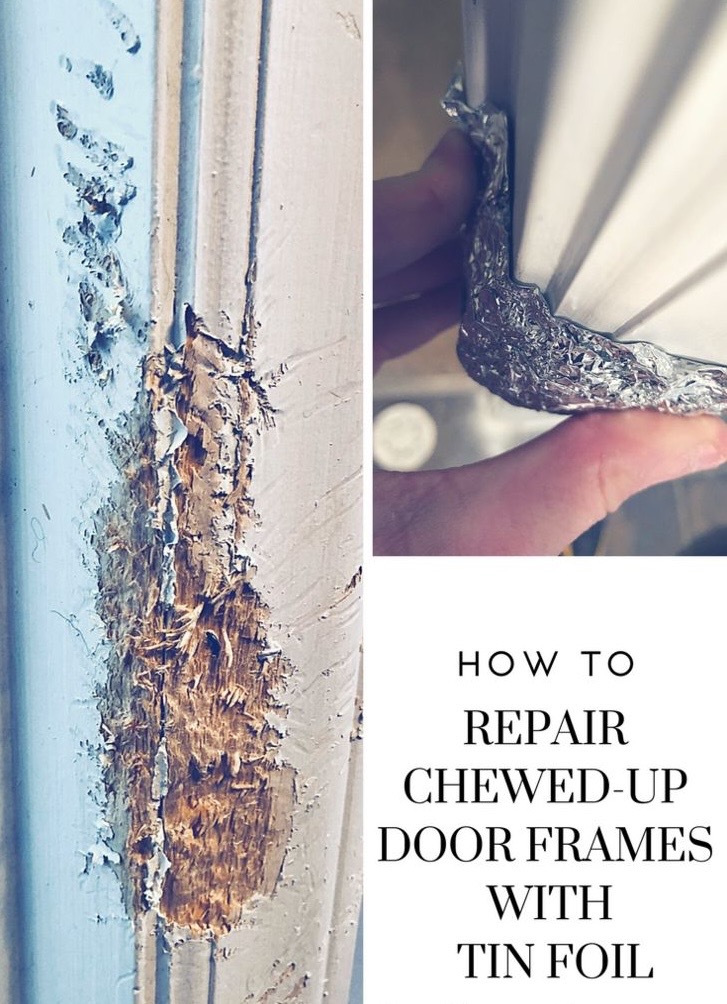
Steps to Recreate Texture Using Foil
1. Prepare the Surface
-
Remove any loose wood fibers from the damaged area.
-
Sand the edges slightly to smooth out sharp irregularities.
-
Clean the surface to remove dust and debris.
2. Fill the Damaged Area
-
Use wood filler or epoxy putty to fill deep gouges.
-
Smooth it with a putty knife, but avoid making it perfectly flat—we need to add texture later.
3. Create the Texture with Foil
-
Take a piece of aluminum foil and crumple it slightly to create a fine relief pattern.
-
Flatten the foil and gently press it onto the still-soft filler or epoxy.
-
Lightly roll over it with your fingers or a putty knife to transfer the texture.
-
Carefully peel off the foil—this will leave an imprint that mimics the natural wood grain.
4. Refining the Texture
-
If the texture is too rough, lightly sand it with fine-grit sandpaper (P220-P320).
-
If the pattern is too faint, repeat the process with a fresh piece of foil.
-
Let the filler dry completely before moving to the next step.
5. Finishing Touches
-
Apply a primer to ensure the paint adheres smoothly and conceals any imperfections.
-
Paint the door frame or molding in the desired color using a brush or roller for a seamless look.
This method allows for a more professional-looking repair, especially when the damage is in a visible area.
If you want a hassle-free solution, you can also use specialized rubber stamps with a wood grain pattern, but aluminum foil remains one of the most accessible and easy ways to create a realistic texture.
Need Help with Repairs?
If you’d rather leave the job to a professional, give me a call or send a message! I specialize in restoring damaged wood surfaces, door frames, and moldings.