
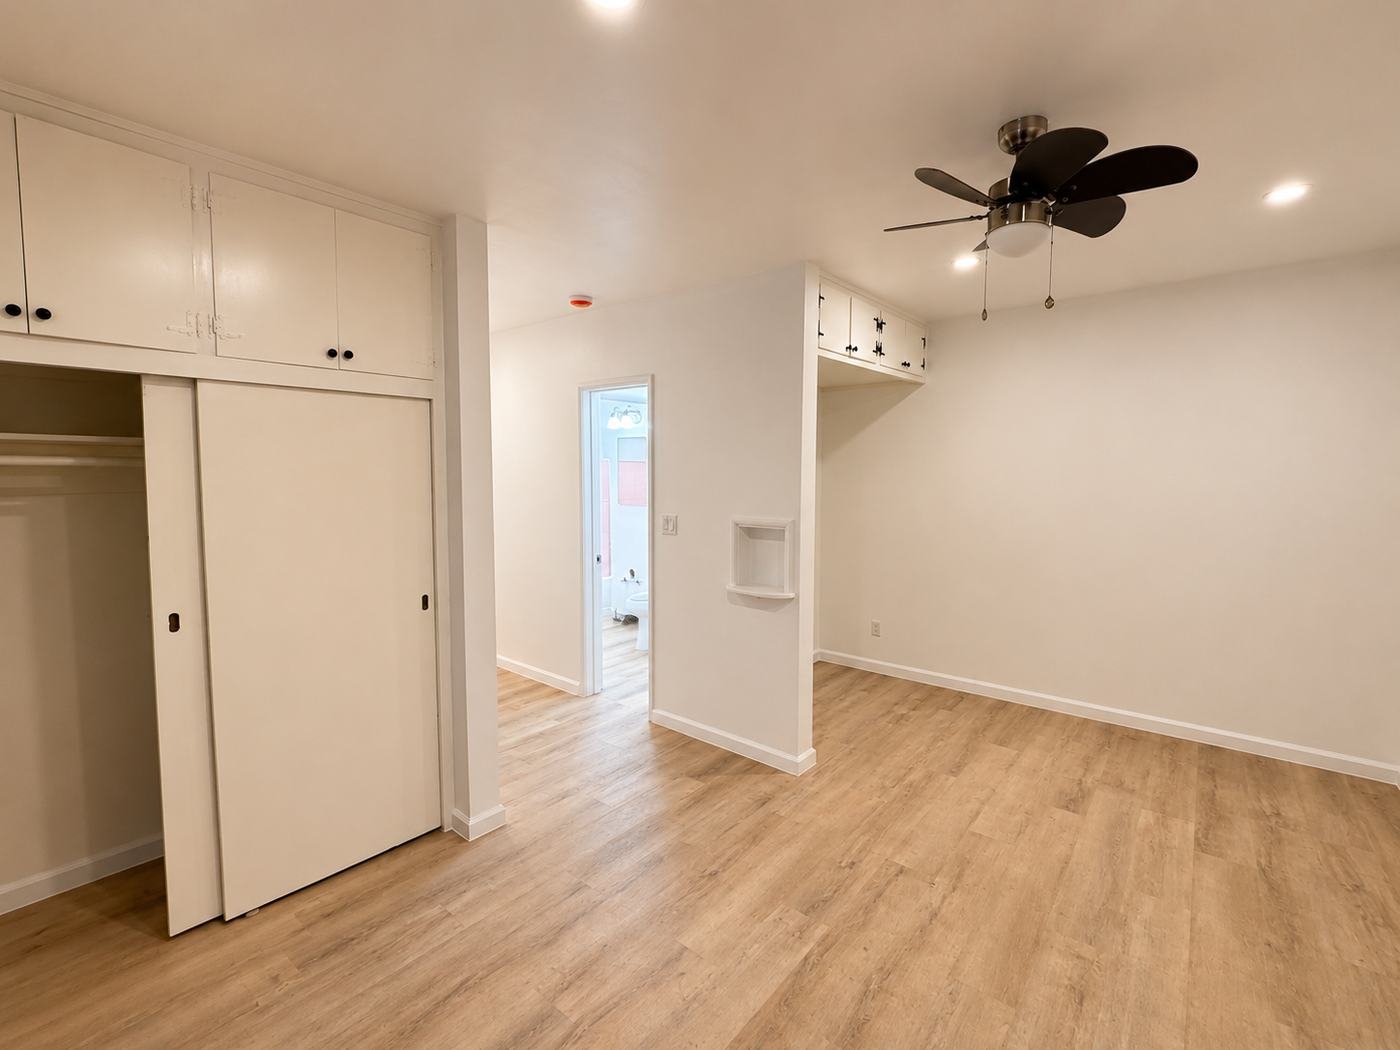
A full apartment remodel in Los Angeles — floors, walls, ceilings, kitchen, bathroom, electrical, plumbing, built-in cabinet restoration, interior doors, finish paint. The unit came in as a shell: holes punched through the ceiling to pipes, damaged plaster, a worn cast-iron tub, dated reclaimed-wood feature walls, and a kitchen that was down to the hookups. We put everything back — modern where it needed to be modern, period-preserved where the character was worth keeping (the original pink tile bathroom and the hinged built-in cabinets both stayed and got refinished rather than torn out).
Project overview
- Location: Rental apartment unit, Los Angeles
- Scope: Full gut and rebuild — flooring throughout, drywall / plaster repair, full repaint, new kitchen (cabinets + quartz counter + subway backsplash + sink + faucet), bathroom refresh (tub refinish, new floor, fixtures, pink tile preserved), electrical updates (recessed lighting, mini-split AC), interior door replacement, period built-in cabinet restoration
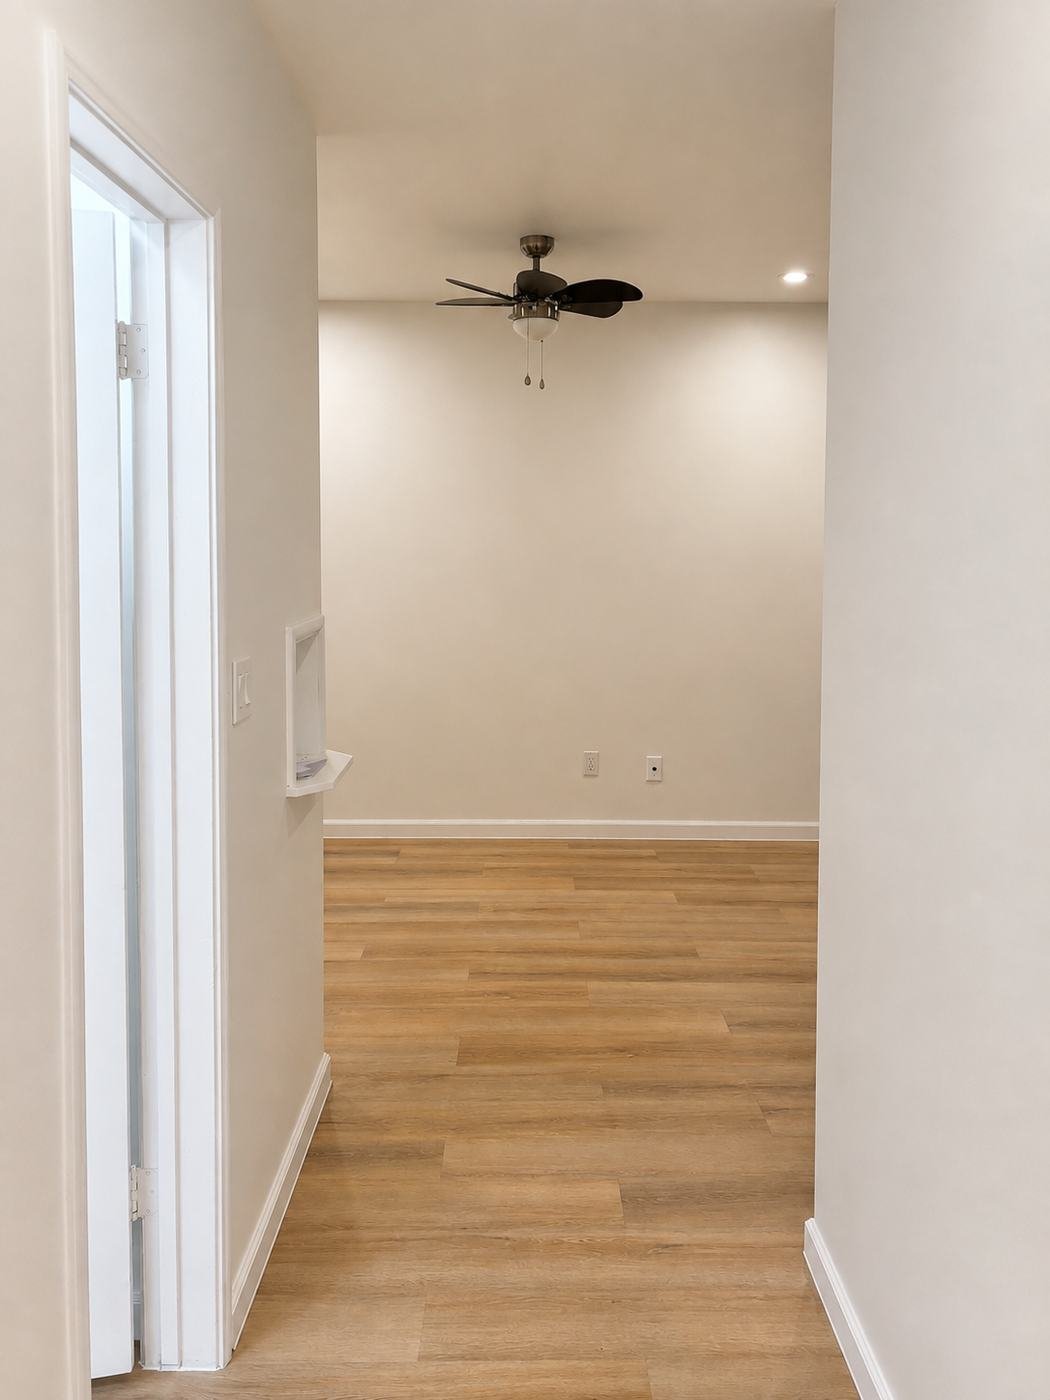
- Flooring: Luxury vinyl plank (LVP), light-oak color, run throughout the unit
- Walls / ceilings: Full plaster and drywall patch, prime, two coats of flat exterior-grade latex, white
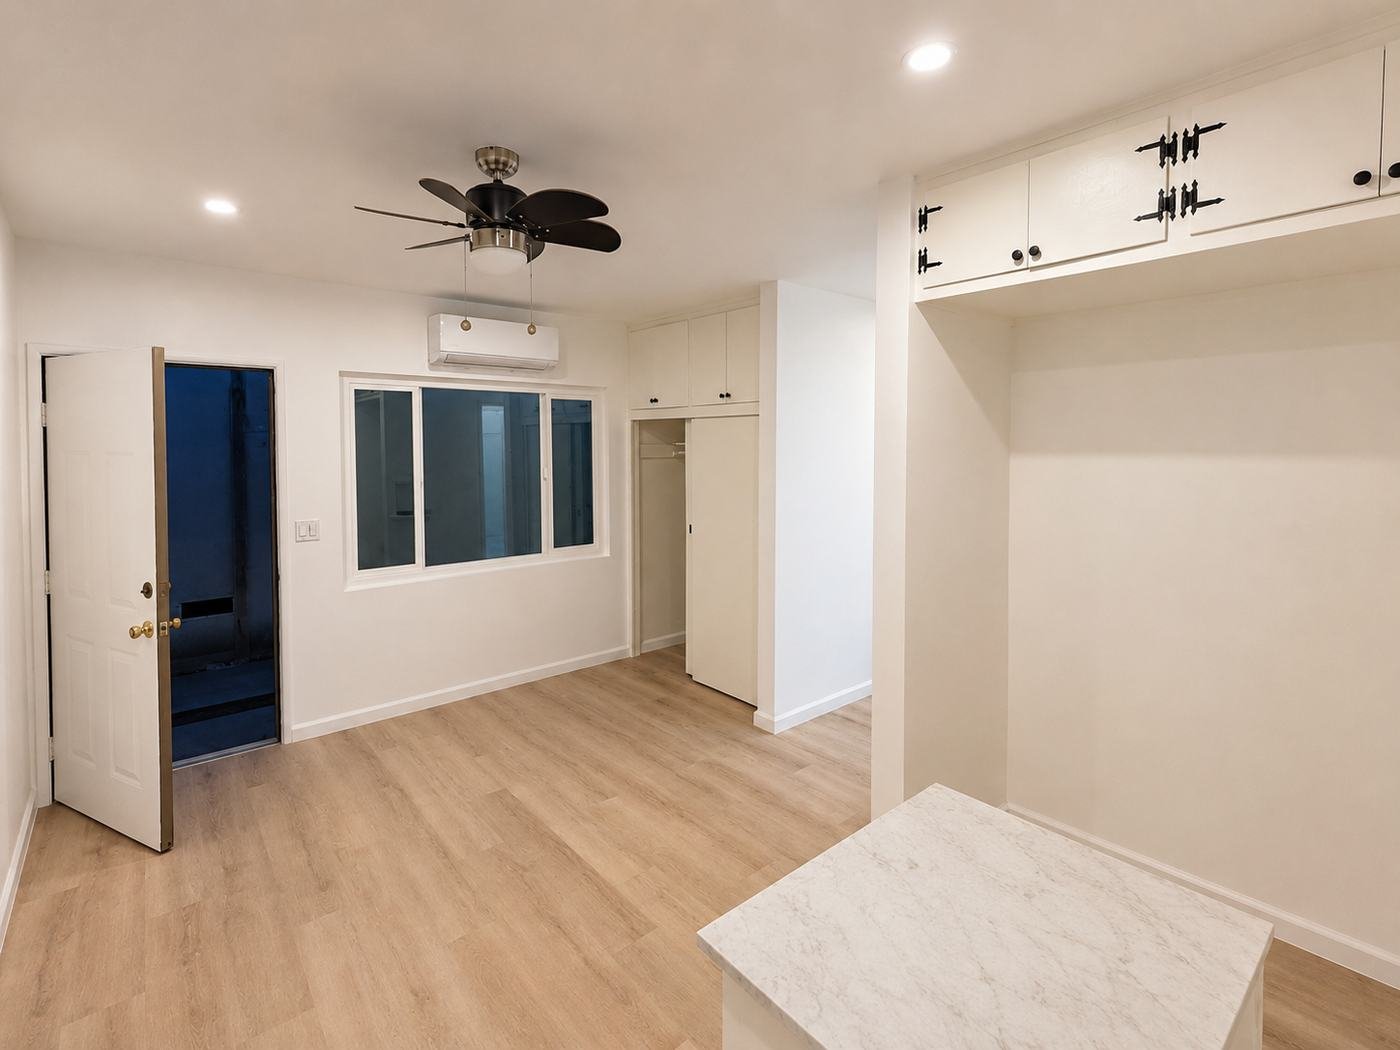
- Preserved details: Original pink wall tile in the bathroom + period built-in cabinets with H-hinges (restored, repainted, new pulls)
Starting point — what the unit looked like
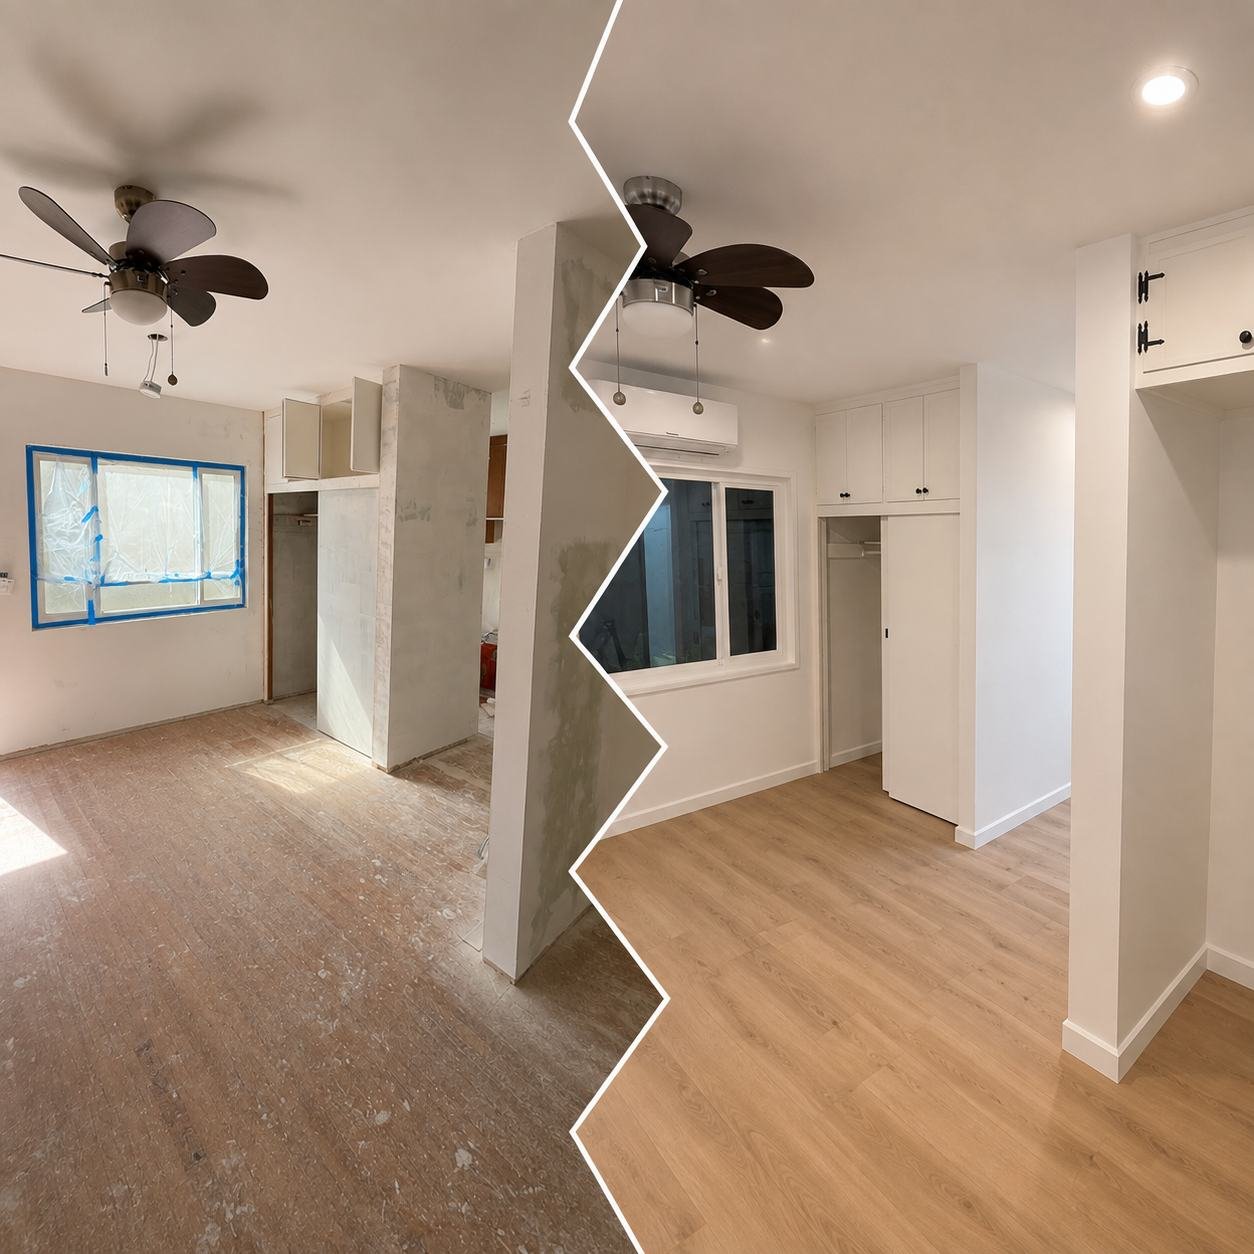
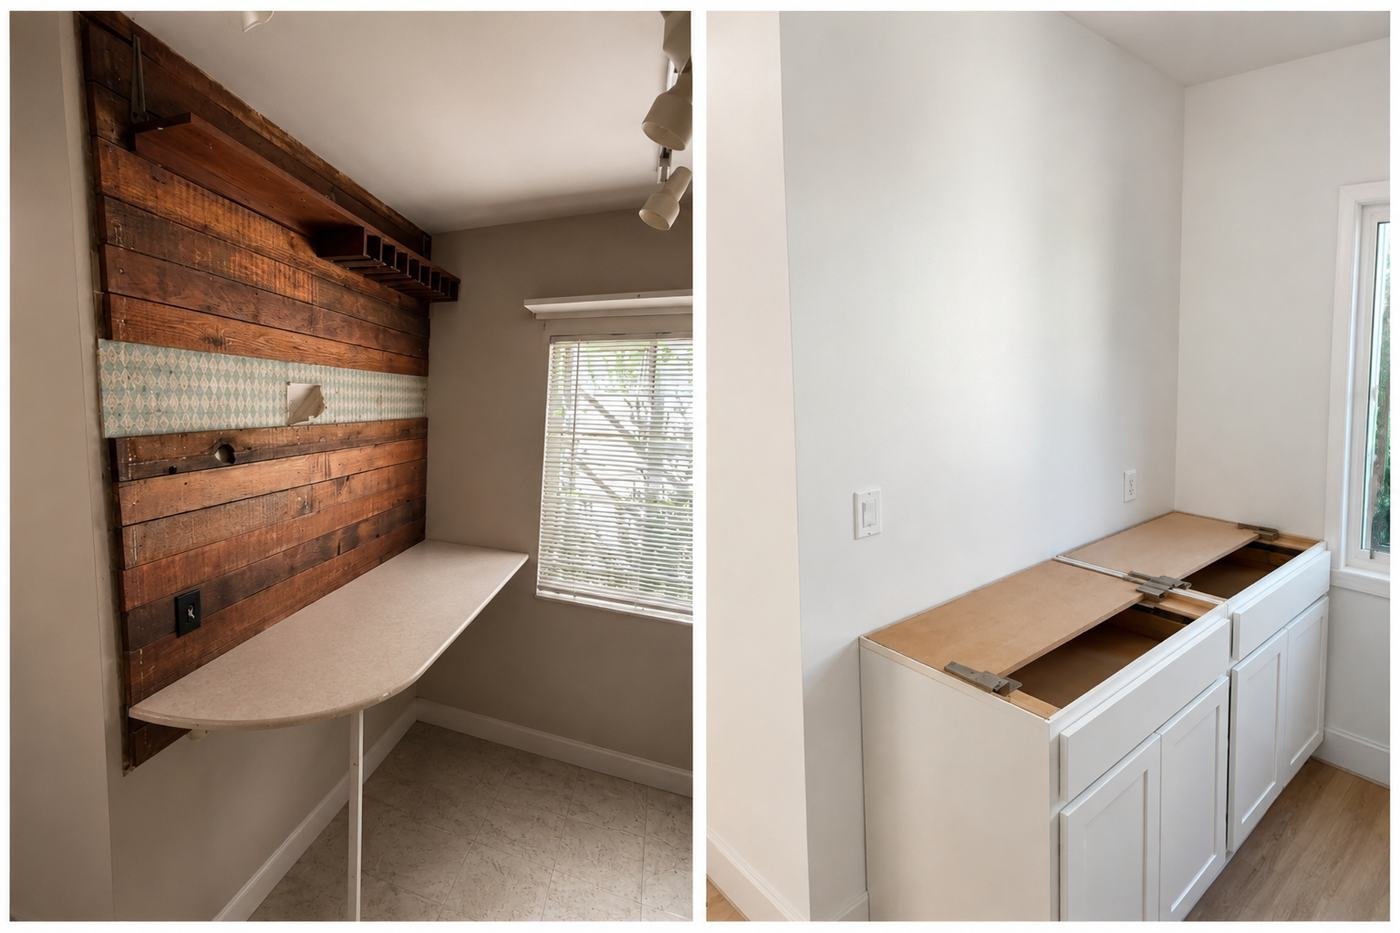
The honest “before” picture matters here because it’s what makes the finished unit read as new. The ceiling in one of the main rooms had a torn-open patch down to the joists where a plumbing issue had been chased; the main room walls were partially skim-coated and partially raw; the subfloor was exposed in places; the bathtub was a cast-iron tub with 30+ years of staining; one wall had reclaimed wood planks nailed over it with a strip of wallpaper and a fold-down table bolted on; and the kitchen was essentially one wall of cabinets and some stub-outs.
Flooring — LVP throughout, done right at the thresholds
LVP (luxury vinyl plank) is the right choice for a rental apartment remodel in LA — stable with temperature and humidity, resistant to spills, cheaper per square foot than hardwood, and installs quickly over a prepped subfloor. The job on this unit:
- Subfloor prep. Any soft or water-damaged plywood cut out and replaced before the underlayment went down. LVP is only as flat as what it’s installed over.
- Underlayment. Rolled underlayment with vapor barrier, taped at seams.
- Install direction. Planks laid parallel to the longest wall to make the room read longer and to minimize visible seams from the entry sight-line.
- Baseboards. New 4″ baseboards after the LVP went down, caulked at the wall and painted — the baseboard is what hides the expansion gap and makes the install look professional.
- Thresholds. Clean threshold strips at every doorway, tucked tight so there’s no catch.
Walls and ceilings — the invisible work that makes everything else read as new
Walls are the part of a remodel nobody mentions but everyone sees. Flat paint on a bad surface still looks bad; flat paint on a smooth, properly primed wall looks finished. On this unit:
- Full plaster patch where needed. The large ceiling hole (above) got patched back with new drywall tied into the existing lath, taped, mudded in three coats, feathered 18–24″ past the patch edge so the transition disappears.
- Skim coat on raw surfaces. Where old wallpaper or wood panels had been pulled, the wall got a full skim coat before paint — otherwise every seam telegraphs through.
- Primer, then two coats. One coat of stain-blocking primer where there were old patches or stains, then two full coats of latex flat on walls, matte on ceilings.
Kitchen — new cabinets, quartz counter, subway backsplash
The kitchen came out as a compact one-wall layout with a small island added. The scope and finish:
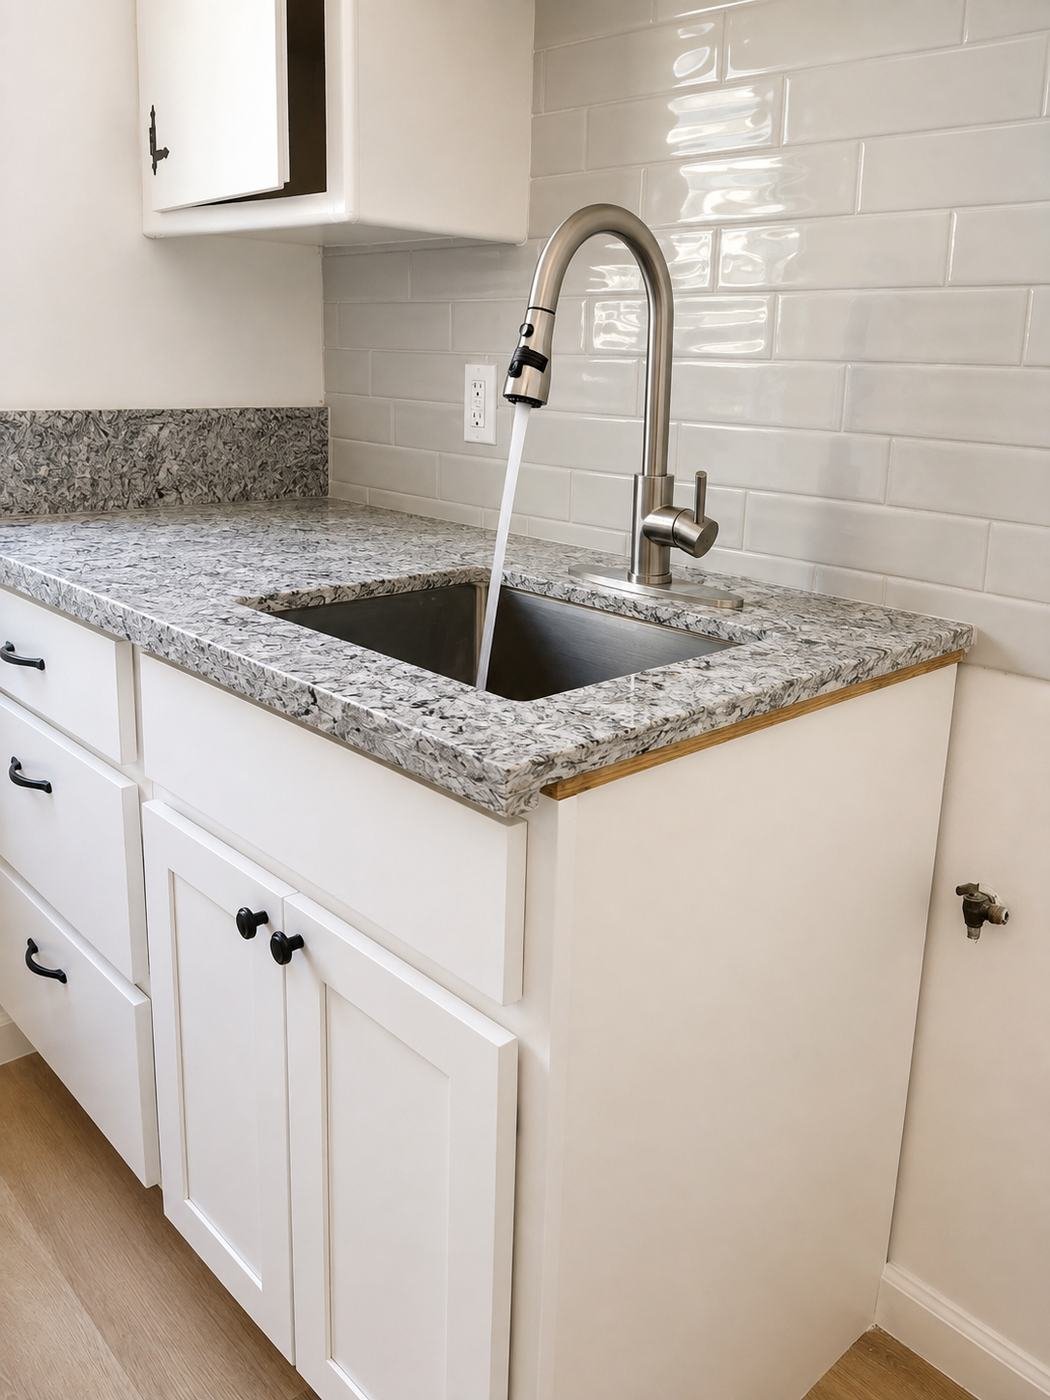
- Cabinets: White Shaker with matte-black bar pulls — classic, timeless, holds up to tenant turnover
- Countertop: Quartz with white-and-grey movement — the stone look at the price point that makes sense for a rental
- Backsplash: White subway tile, slight waviness in the glaze catches light
- Sink + faucet: Stainless undermount sink, pull-down faucet
- Marble-top island: Added for prep + eat-at space — raises the kitchen from “efficiency” to “actual kitchen”
Bathroom — pink tile kept, everything else new
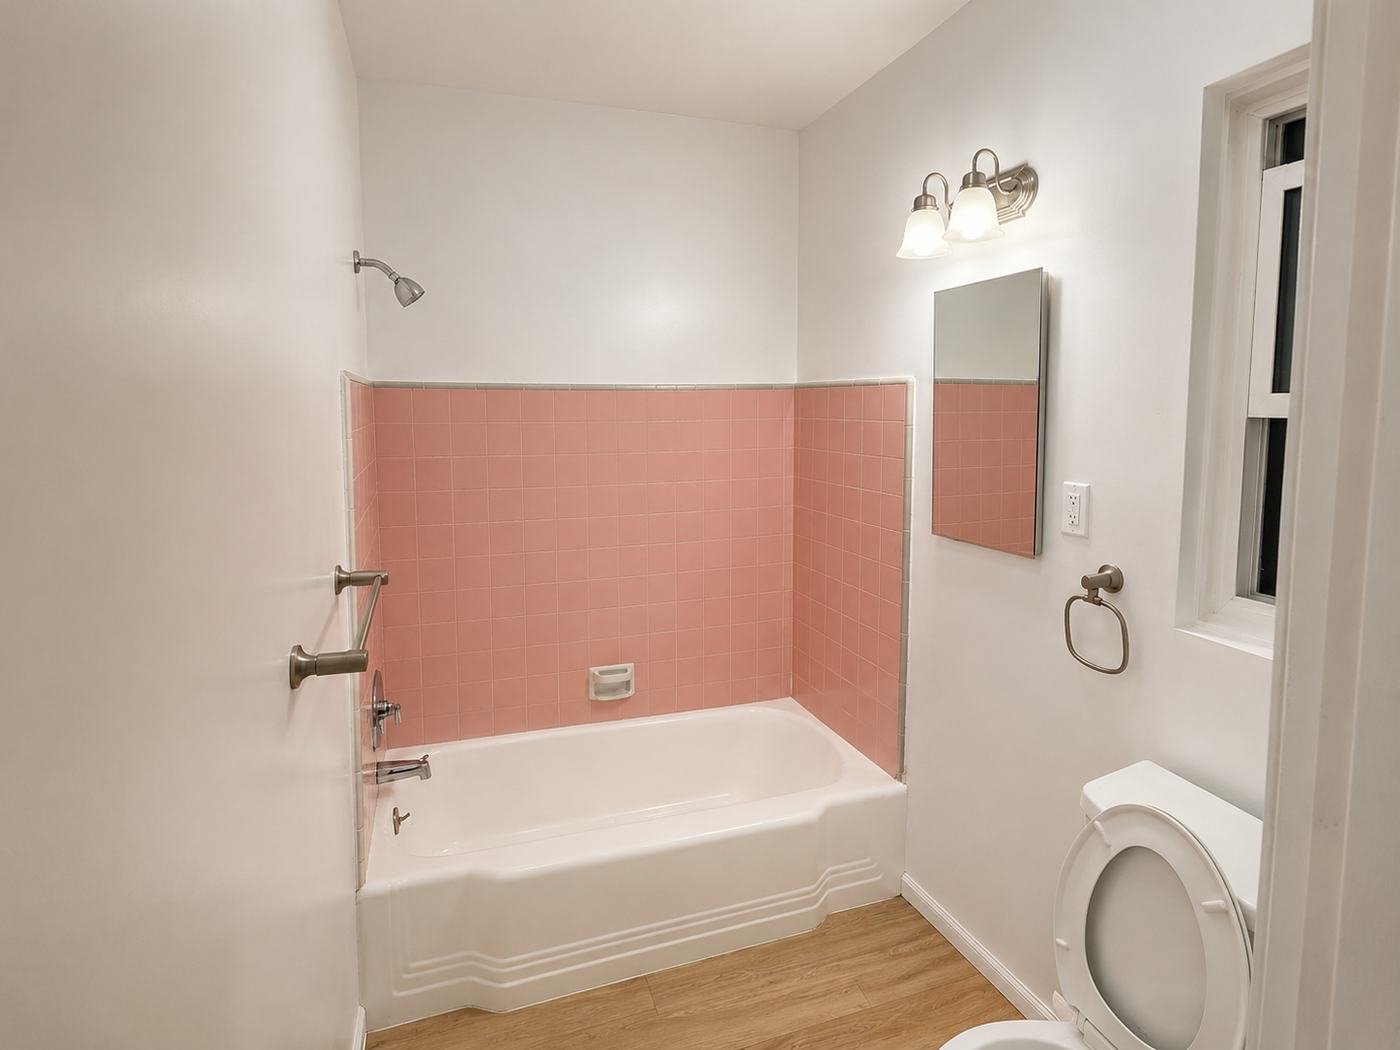
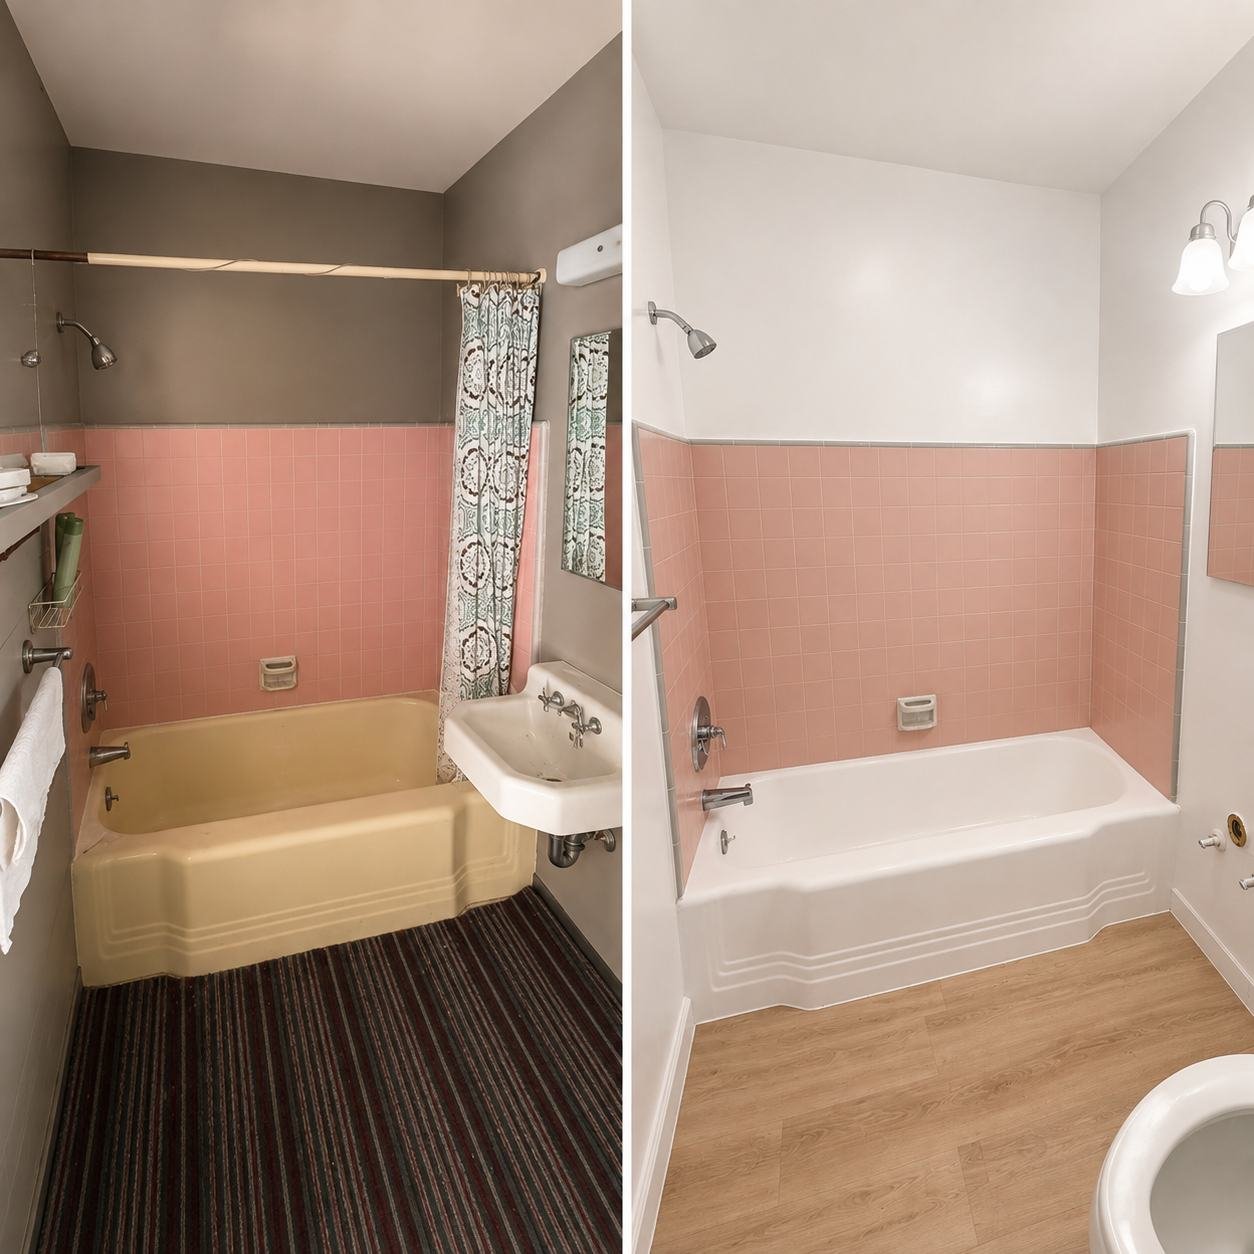
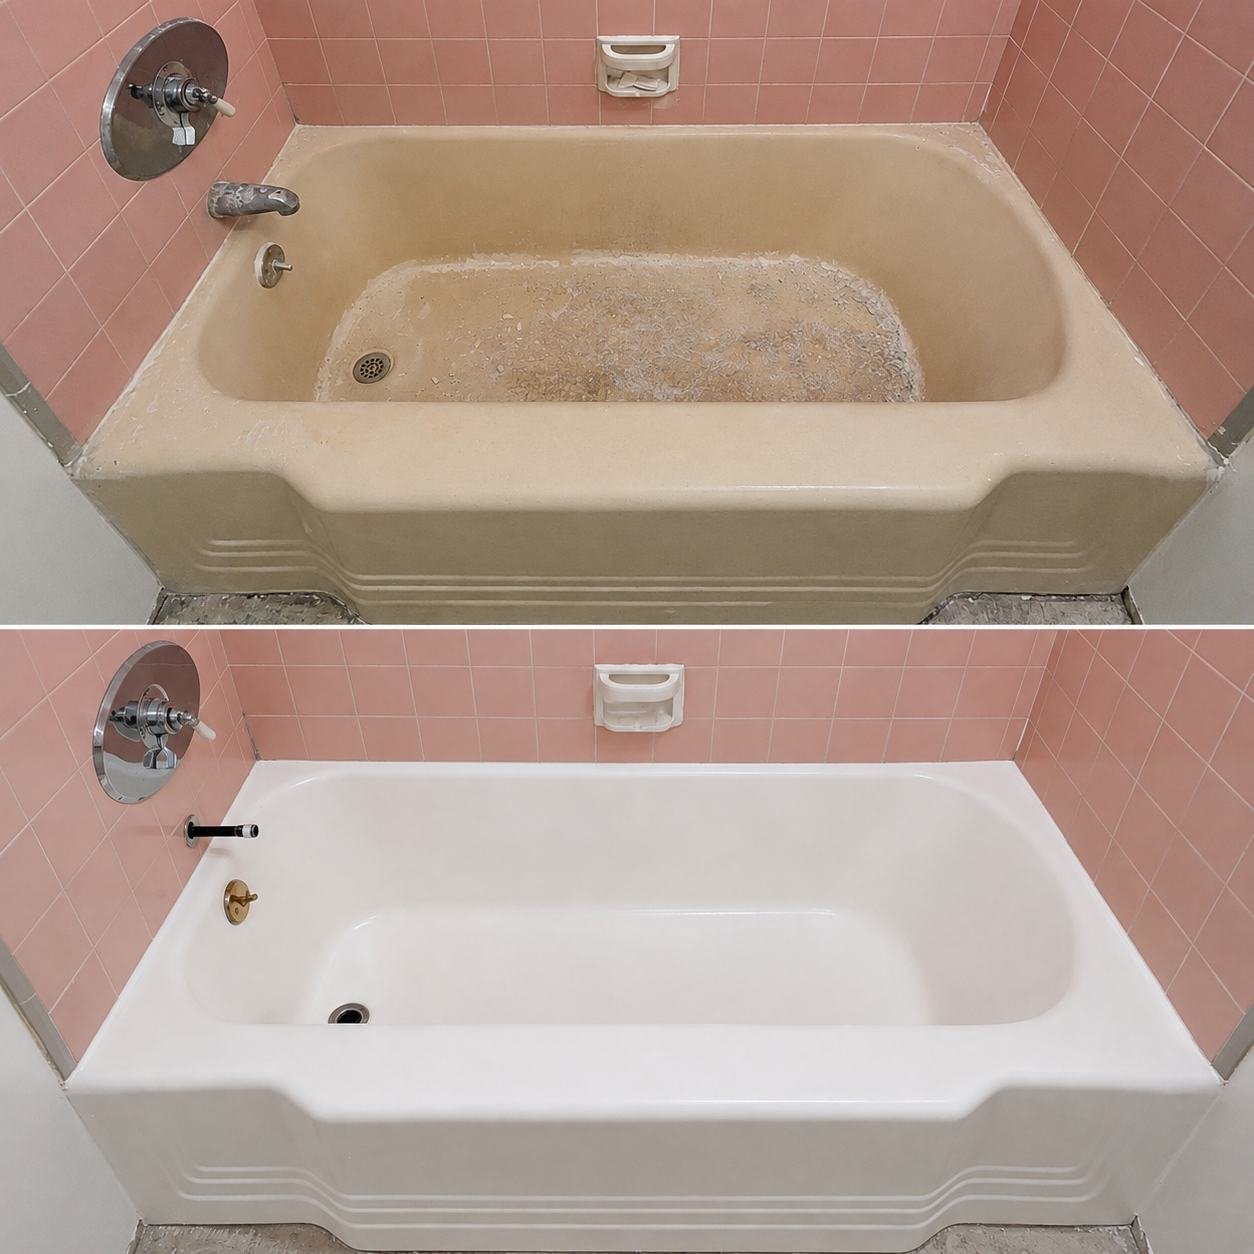
The bathroom had an original pink wall tile that most people would rip out. We kept it. Mid-century pink tile is on the way back as a design detail; it’s often grounded in the ceramic itself (not a surface finish that fades) and tearing it out means losing the character that distinguishes an old-building unit from any new build. The real problem was the tub, the floor, and the fixtures — all of which were replaceable without touching the tile.
- Bathtub refinish. The cast-iron tub was refinished in bright white — chip repair, acid etch, bonding primer, two coats of acrylic urethane. Full dry time before use. Looks and feels new; weight and stability are the same as the original (because it is the original).
- New floor. Pulled the dark carpet, prepped the slab, installed water-resistant wood-look LVP that matches the rest of the unit.
- New fixtures. New showerhead, tub spout, trim, grab bars, mirror, towel ring. Chrome finish picks up the chrome accents on the valve.
- Pink tile preserved. Grout re-sealed, dirty grout lines scrubbed, two cracked tiles replaced from a leftover run on top of the tub surround.
Period built-in cabinets — restored, not replaced
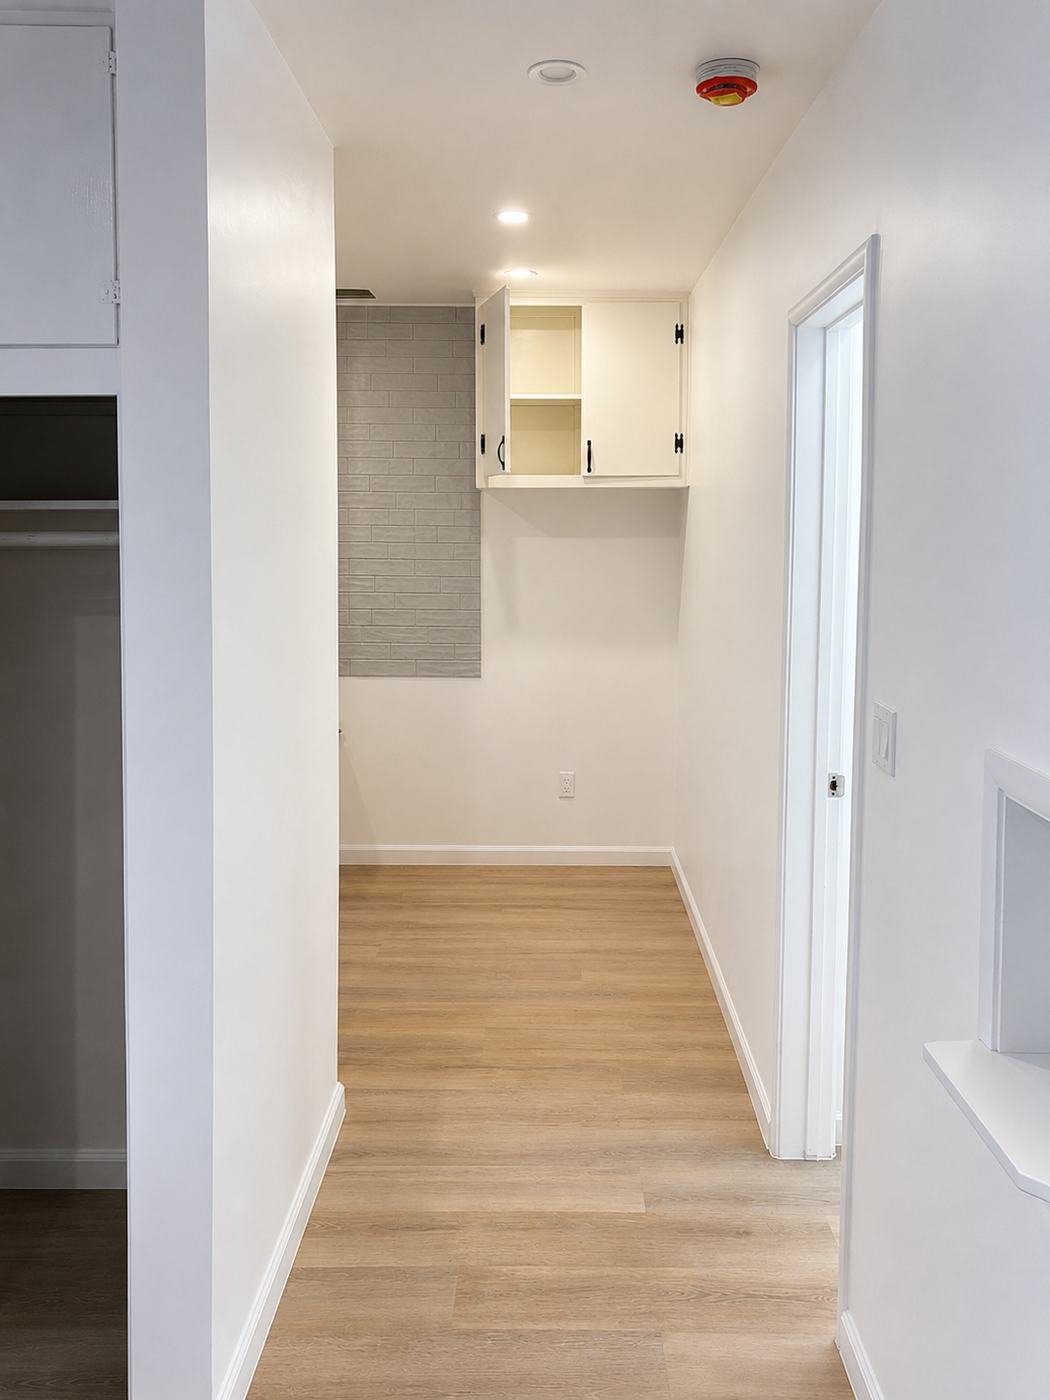
The unit had original built-in cabinets with H-hinges and bead-board detailing — pre-war apartment detail that’s irreplaceable. These got stripped where paint had bubbled, patched, re-primed, repainted white with new matte-black knob and H-hinge finishes to match. They now read as intentional design detail rather than something that got left in.
Electrical — mini-split AC + recessed lighting
- Mini-split AC indoor unit installed on the main-room wall, wired back to the condenser line-set.
- Recessed LED lighting added to the hallway and kitchenette for the first time in the unit’s history.
- Outlets and switches updated throughout to GFCI where code requires (kitchen, bathroom).
- Smoke detector re-mounted and tested.
Doors and finish work
Interior doors replaced where they were damaged, hung with new hinges, latch-plates aligned. New baseboards throughout, painted to match wall color at the trim transition.
Why this remodel approach — modern where it matters, preserved where it mattered
The temptation on an older apartment unit is to strip everything out and rebuild to modern spec. That approach is expensive, loses the character that distinguished the unit, and often doesn’t rent for any more money than a proper restoration would. The hybrid approach on this one — modern kitchen + modern floor + modern electrical, period bathroom tile + restored built-ins — gives the tenant a unit that feels finished without feeling generic.
Need a full apartment or unit remodel?
If you’ve got a rental unit, a condo, or a home that needs a full top-to-bottom remodel — flooring, walls, kitchen, bath, electrical, finish — we handle the whole scope on one project across Los Angeles. Free on-site walk-through and estimate.
Call ProHands: (818) 401-7766 · Email: info@prohandshandyman.com · Serving: Los Angeles, Glendale, Burbank, Pasadena, San Marino