
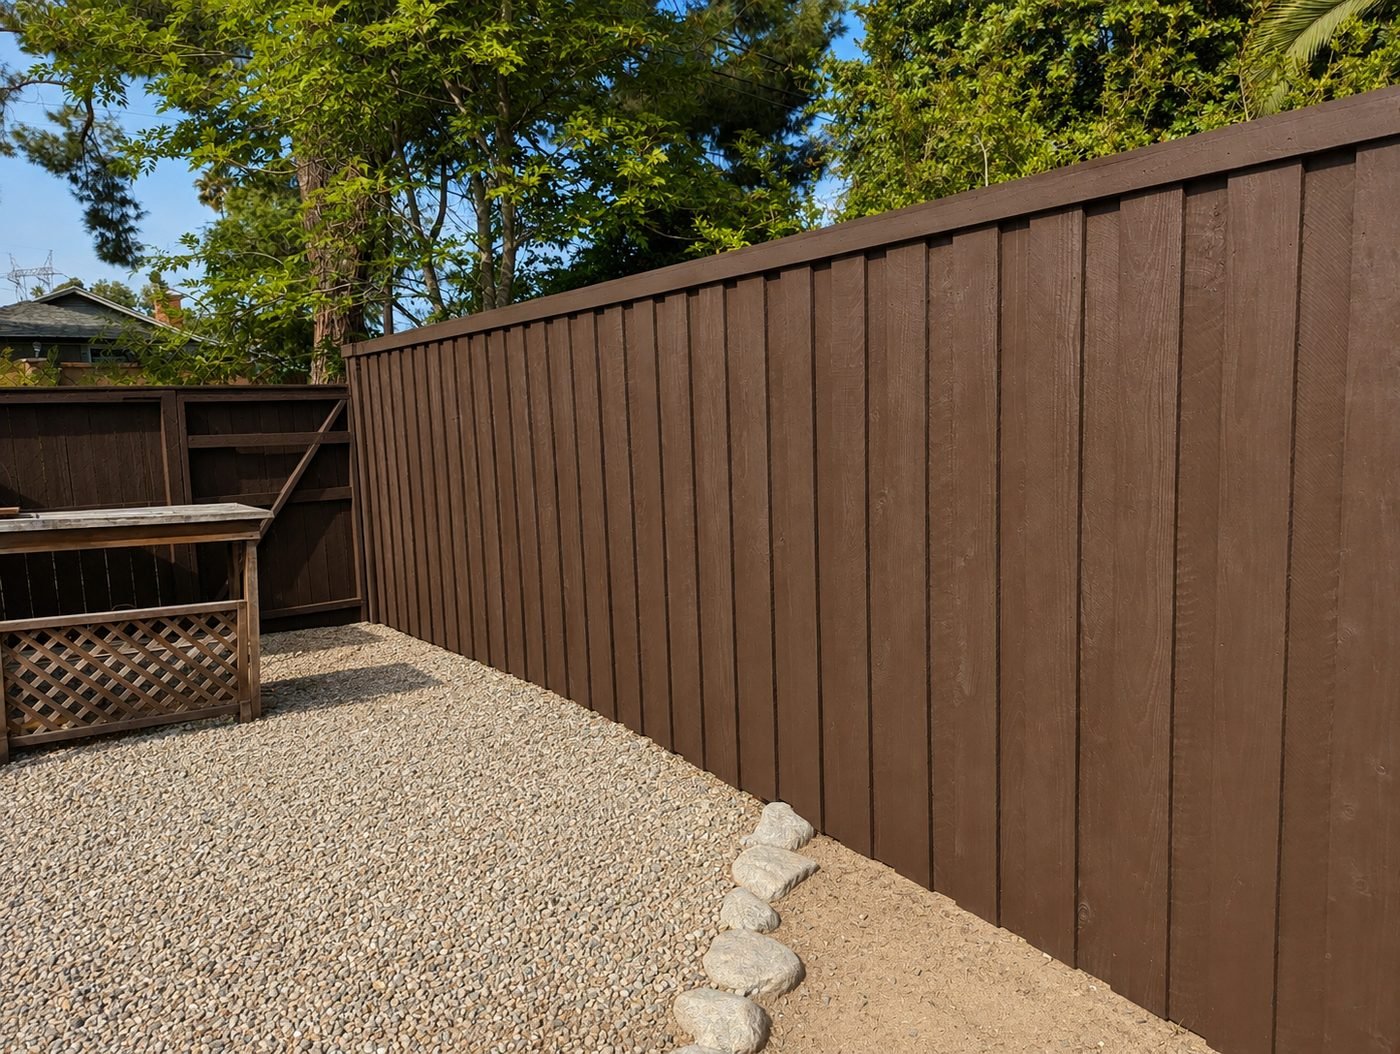
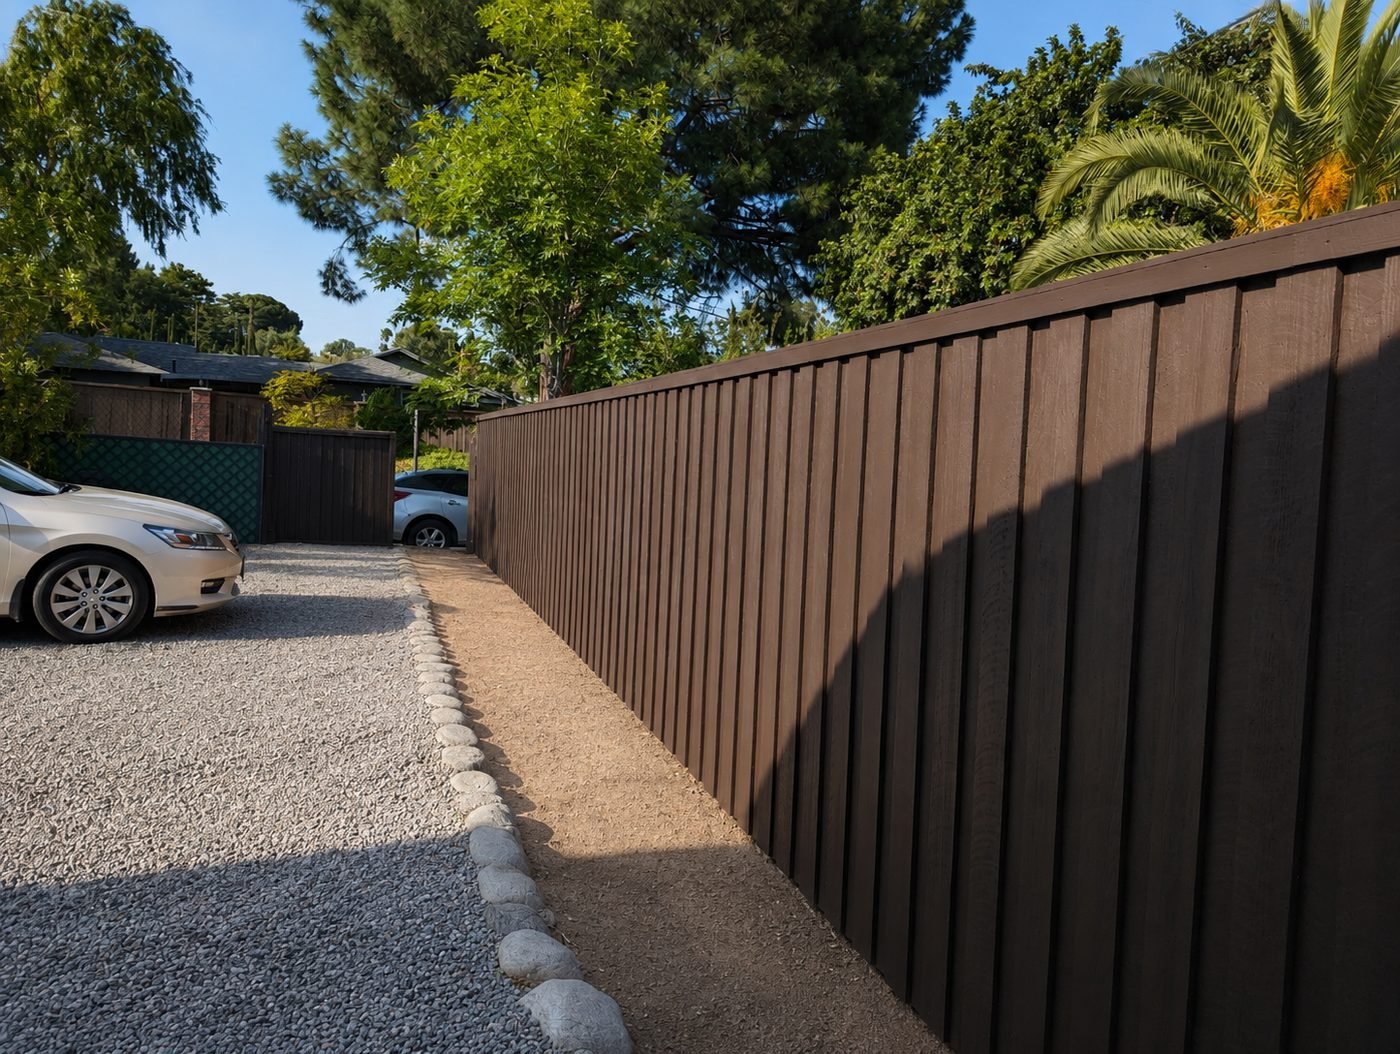
A full new wood fence around a Los Angeles home — custom-built board-and-batten cedar construction, wrapped around the entire back yard, side yard, and driveway line, finished in a deep chocolate brown oil-based stain. The owner wanted total privacy, a warm-toned material that reads as fine carpentry rather than a stock fence panel, and a build that would hold up in Los Angeles sun for decades. Board-and-batten cedar in chocolate stain answers all three.
Every part of this fence was purpose-built for the property: cedar posts set in concrete along a run that steps once to follow the property grade, tight-fit boards with vertical battens covering every seam, a flat top rail cap the full length, and end-grain sealing at the top and ground line where wood fences fail first.
Project Overview
This is a full-perimeter fence — three long runs wrapping the backyard, side yard, and along the driveway line, tying into the house at both ends. Total length was substantial, and the entire run had to look like one continuous piece of carpentry rather than a series of stitched-together sections.
The build included:
- Demolition of the old fence and site clean-up
- New cedar 4×4 posts, set in poured concrete, plumbed and aligned
- Cedar horizontal rails between every post pair, screwed into blocking
- Board-and-batten cladding — cedar boards tight-fit against the rails, then vertical battens covering every seam
- Flat top rail cap the full length, mitered at corners, stepped once where the property line grade drops
- Two coats of oil-based semi-transparent stain in deep chocolate brown, brushed and back-brushed on both sides
- Extra sealing pass on all end grain (post tops, top rail cap, ground-line board ends)
- Careful masking and protection of surrounding pavers, gravel yards, plantings, and the stucco side of the house
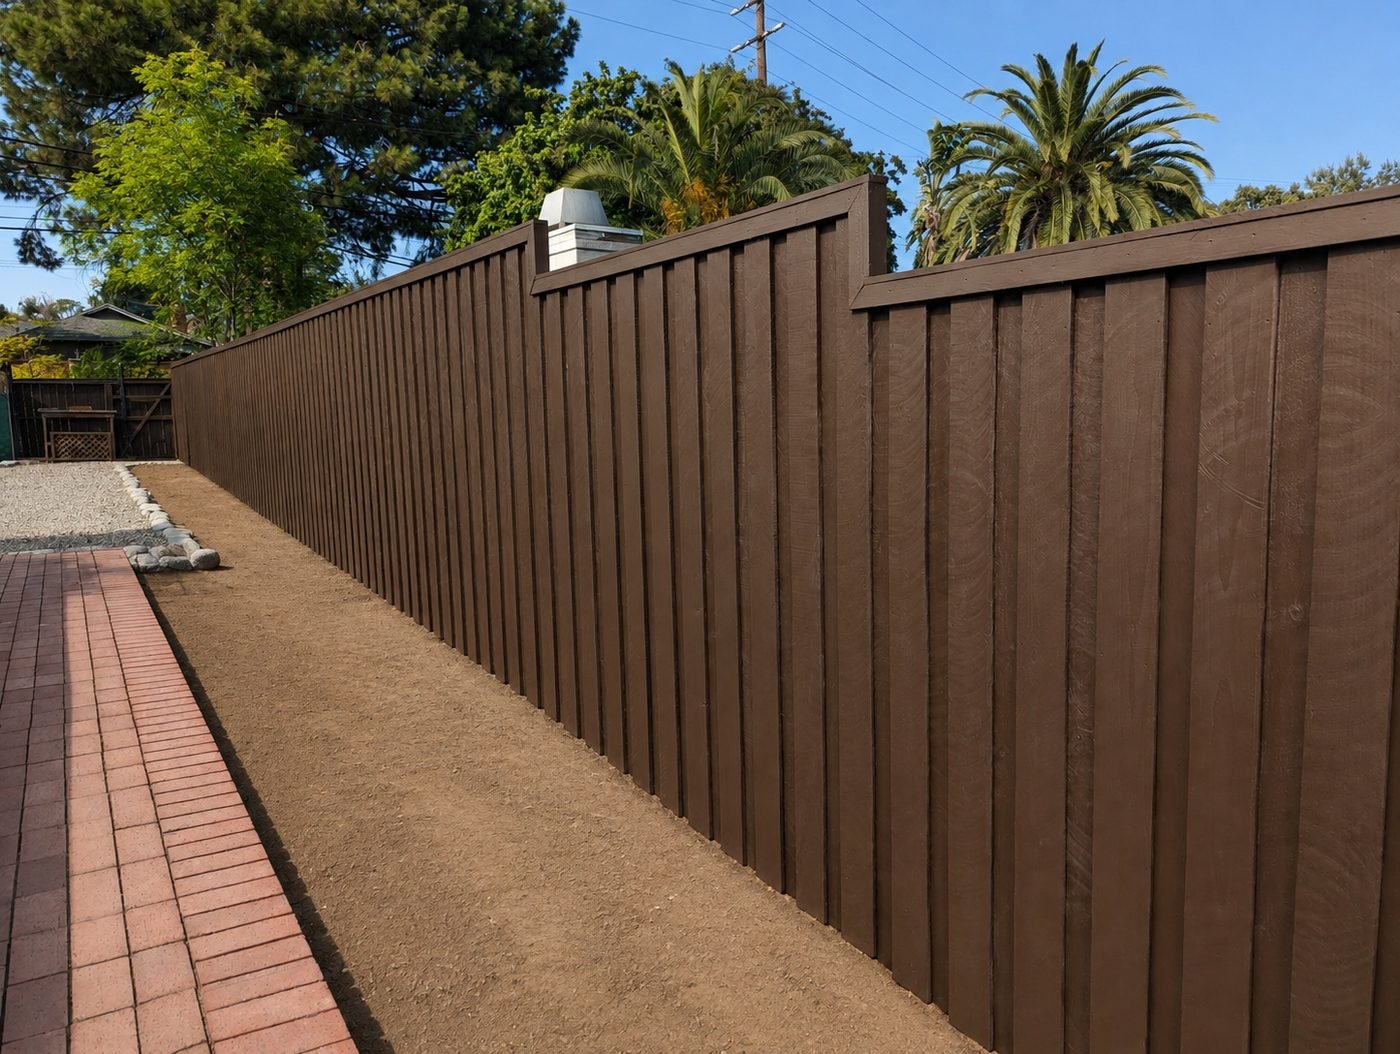
Why Board-and-Batten Cedar
Board-and-batten is a specific style choice. It’s not the fastest fence to build and it’s not the cheapest. It’s the one you pick when the fence matters to the look of the property.
- Full privacy. The board layer covers the frame, and the batten layer covers every board-to-board seam. From either side you get a solid wood surface with no line-of-sight gaps at all.
- Reads as carpentry, not fence. The vertical batten line running the full height turns a fence into a piece of architecture. It picks up the vertical lines of a house’s board-and-batten siding, doors, or windows and ties everything together.
- Structurally over-built. Two layers of wood over the frame make the fence heavier, stiffer, and more wind-resistant than a single-layer picket or dog-eared build.
- Detail hides seasonal movement. Cedar boards expand and contract seasonally. In a stockade or picket fence, that movement opens visible gaps. Under a batten, the movement happens behind the batten and stays hidden.
Cedar as the wood species is the other half of the decision. Cedar has natural oils that resist rot and insects, it’s dimensionally stable, and it takes stain beautifully. Redwood works too but is more expensive; pressure-treated pine is cheaper but doesn’t finish the same way and doesn’t hold stain as long.
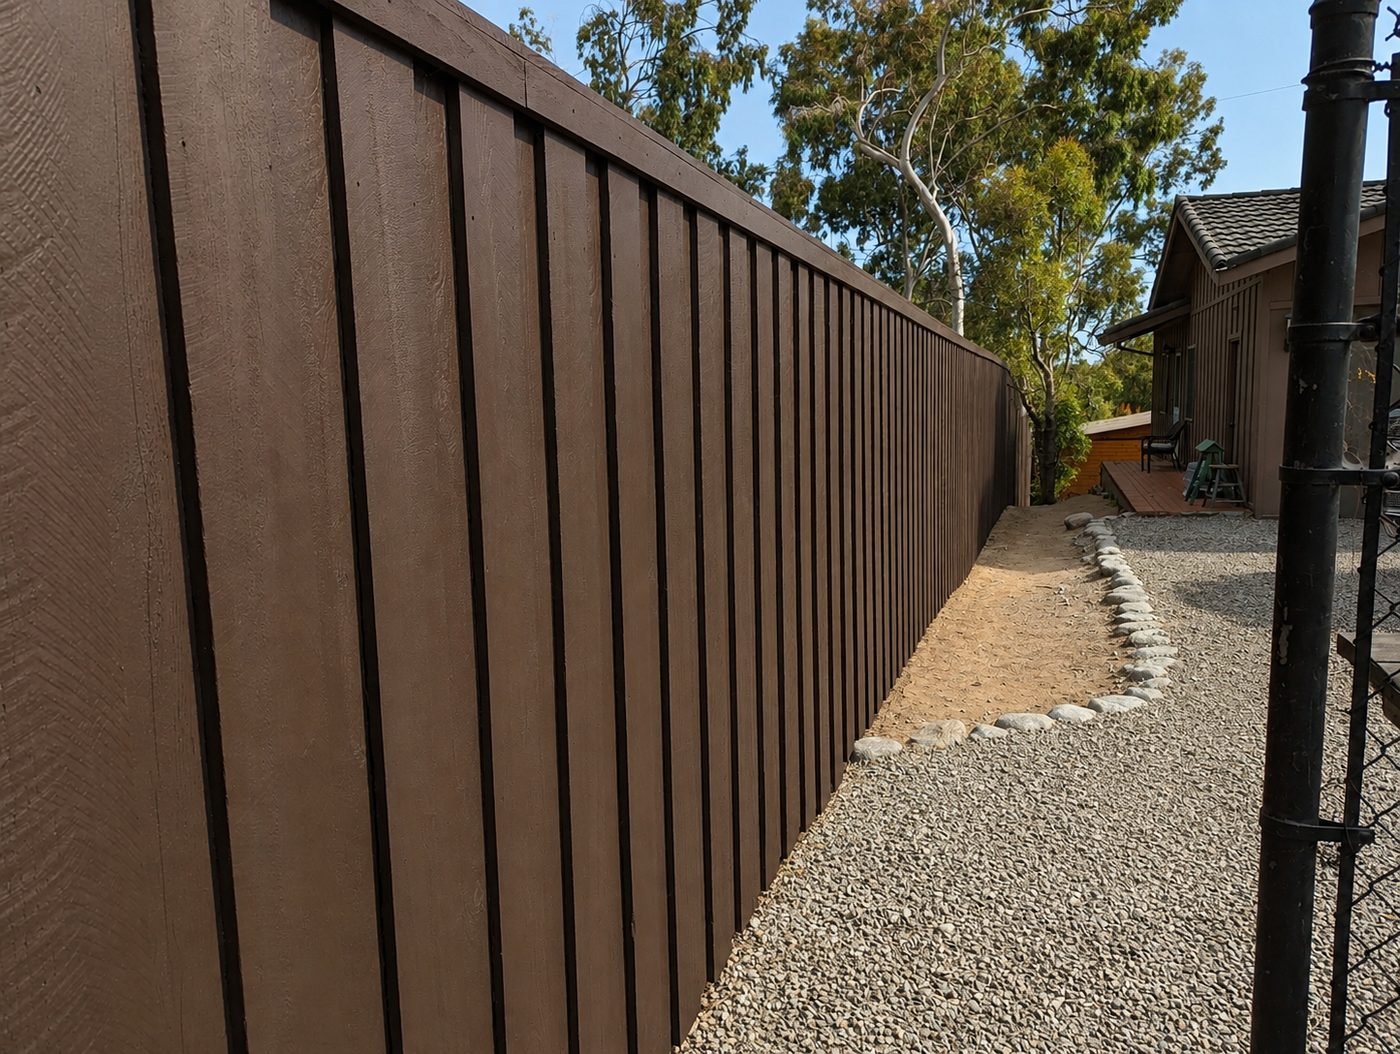
Posts First — The Foundation of the Fence
The posts are what determine whether the fence stands straight for 20 years or leans at year 5. We over-spec the post work on every fence we build:
- 4×4 cedar posts, minimum grade. No pressure-treated pine at the foundation of a decorative fence — it can bleed and stain the finish.
- Concrete-set to 24–36 inches below grade, depending on soil and post height. Poured, not just packed dry.
- Sloped concrete crowns at the top of each post hole to shed water away from the post base.
- All posts plumbed and aligned before the concrete sets, so the rail runs are dead straight.
- Post spacing at 6 to 8 feet depending on wind exposure and adjacent structures.
Skipping any of these is how you end up with a fence that looks great year one and leans visibly by year three. Board-and-batten is heavier than a picket fence — the posts have to be built for that load.
Frame + Cladding — How the Fence Actually Goes Together
Once the posts are set and cured, the build sequence is:
- Horizontal rails — top, middle, and bottom cedar 2×4s spanning between posts, screwed into blocking mortised into the post face. Cross-braced at long spans.
- Board layer — cedar 1×6 or 1×8 boards, tight against each other, screwed to the rails from the front. Each board carefully squared to the top rail so the top line is dead level.
- Batten layer — cedar 1×2 or 1×3 battens vertically over every board seam. This is the layer that gives the fence its board-and-batten look and closes any gap that could open as boards expand and contract.
- Top rail cap — a flat cedar cap board running the full length across the top, protecting the end grain of every board underneath. Mitered at outside corners, stepped once at the grade change.
- Bottom protection — boards held slightly above ground line, not in contact with dirt or gravel splash-back.
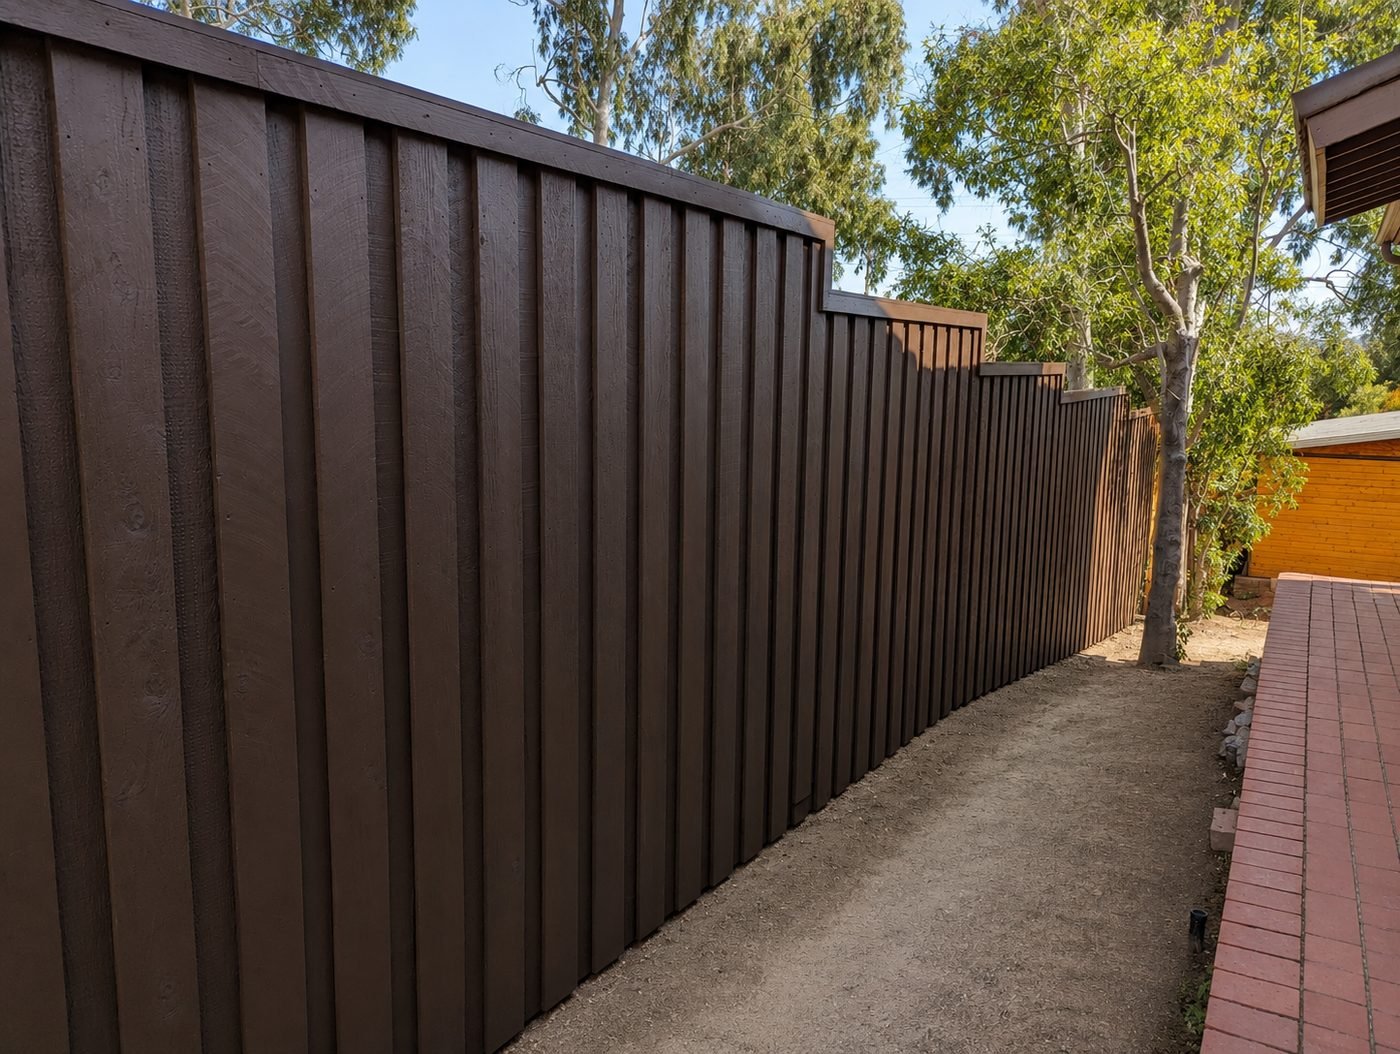
Finish — Deep Chocolate Brown, Oil-Based, Two Coats
The stain is what most people see first on a fence. It’s also what protects the wood. The specification for this fence:
- Oil-based, semi-transparent — penetrates cedar grain instead of sitting on the surface. Semi-transparent lets the grain read through the color, so the fence keeps looking like real wood rather than painted material.
- Deep chocolate brown — dark tones hold under LA UV. Lighter browns wash out fast in direct summer sun. Chocolate reads as saturated for 5 to 8 years before it needs a refresh.
- Two coats — one coat looks fine on day one but leaves the cedar hungry. The second coat is what carries the color depth and the weather resistance.
- Brushed, back-brushed — the boards are wide, the battens narrow, and the seams between them are where a spray finish always fails. Brushing works stain fully into every joint.
- Both sides. The back of the fence (neighbor-facing) gets stained the same as the front. If you skip the back, the fence dries out at a different rate on each side and starts to cup.
The Stepped Top Rail — Following the Grade
The property line on this build was not flat. Standard fence practice is to keep the top rail level and let the bottom follow the grade — leaves gaps at the bottom you fix with kickboard. We did the opposite here.
We stepped the top rail once, at the grade break, and kept both sections of the run at a constant height above the grade. The result is a fence that reads as intentional — the step becomes an architectural feature, not a workaround — and the bottom sits tight to the ground line the whole way.
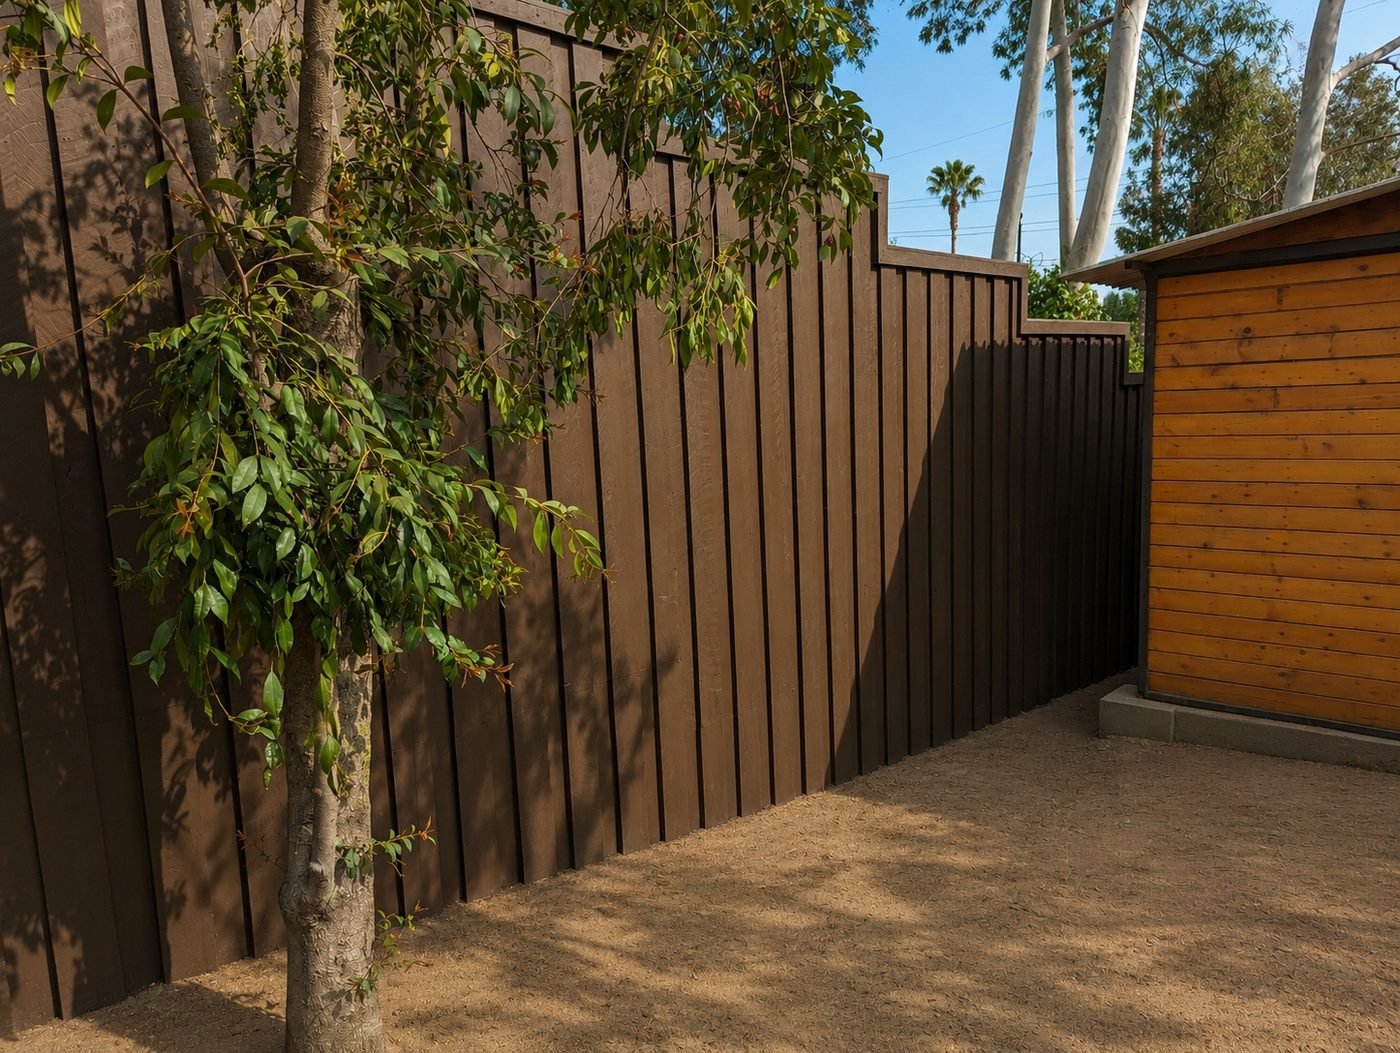
Protecting Adjacent Surfaces During Install and Finish
The fence bordered a yard already finished with:
- Brick paver walkway
- Pea gravel yard with cobblestone edging
- Compacted decomposed granite path
- Established shrubs and a Japanese maple
- The stucco side of the house
Every one of those is a surface that would take stain in the wrong way. Drop cloths along the entire base of the fence, tape and paper masking on the cobbles, and clean cloth tents around the base of every close planting. Not a drop of stain hit anything it wasn’t supposed to. This kind of protection takes longer than the staining itself but it’s the difference between finishing a project cleanly and calling the client back to redo damaged surfaces.
How This Fence Ages
With cedar, oil-based semi-transparent chocolate stain, two coats, correct install, in Los Angeles sun:
- Years 1–5: Color reads deep and saturated. No maintenance needed beyond a spring rinse to knock dust off.
- Years 5–8: UV-facing sections (south and west exposure) begin to lighten slightly. Shaded runs still look new.
- Year 8+: Time for a light re-stain coat on the UV-heavy sections. Not a full strip-and-refinish — just a maintenance pass to bring the color back.
- Year 15–20: Full re-stain on the whole fence keeps it in service another decade.
Cedar posts set in concrete correctly hold their alignment through all of that. The structural life of the fence is 25–35 years easily; the finish is what needs periodic attention.
Board-and-Batten vs Other Wood Fence Styles
If you’re choosing between fence styles, here’s how board-and-batten compares to the other common options for a Los Angeles residential yard:
- vs Dog-eared picket: Board-and-batten gives full privacy and reads more architectural. Dog-eared picket is cheaper and faster but has visible gaps and a more casual look.
- vs Stockade: Both give privacy, but stockade has visible board seams. Board-and-batten hides them under battens for a cleaner, more finished look.
- vs Horizontal slat: Horizontal slat is contemporary and clean but shows every board joint and can sag on long runs. Board-and-batten reads more traditional and hides joints entirely.
- vs Vinyl: Vinyl needs no finish but never reads as real wood. On a property where the fence is visible from inside the house, vinyl always looks like vinyl.
- vs Metal/composite: More expensive, no wood warmth, but zero maintenance. If you truly never want to touch the fence again, this is the trade-off.
Planning a New Wood Fence Installation in Los Angeles?
ProHands Home Improvement designs and builds custom wood fences across Los Angeles, Glendale, Burbank, Pasadena and the surrounding neighborhoods. Board-and-batten cedar, dog-eared pickets, horizontal slat, stockade, custom gates — every build sized and detailed for the specific property.
Contact us for a walk-through and a straight-forward quote — real material specs, real labor estimate, no upselling.