
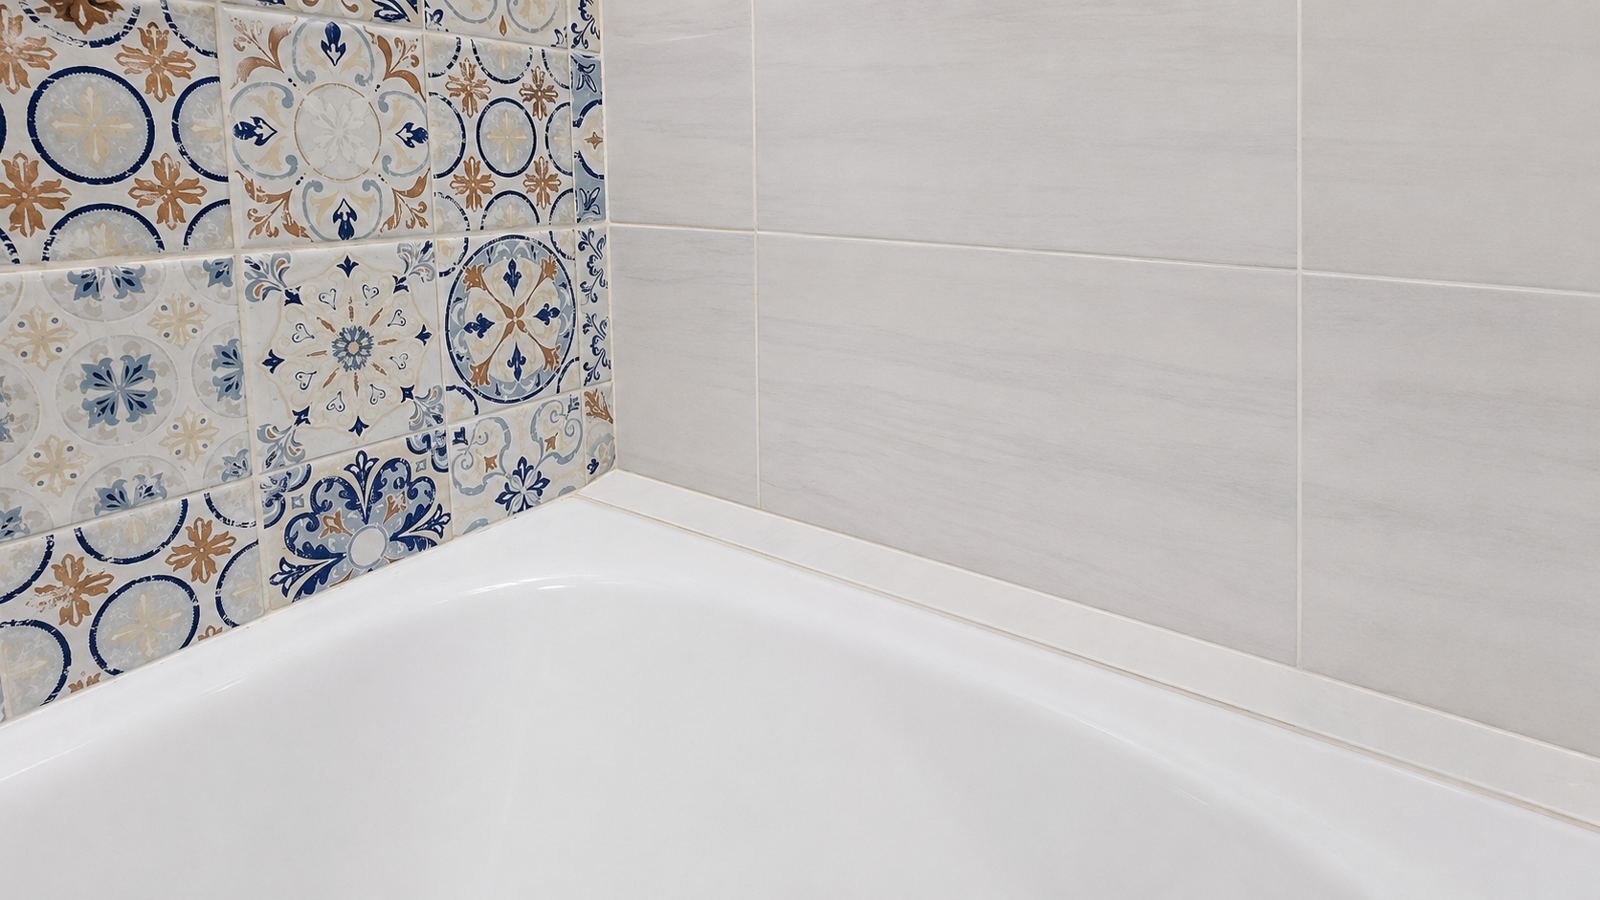
The goal on this Los Angeles bathroom remodel was to build a full tub surround around one specific design decision: a patterned encaustic-look ceramic tile — a mixed patchwork of blue, navy, and warm-orange floral and geometric motifs on a cream field — used as a full-height feature on the back wall of the tub area and continued down the tub apron. Everything else in the bathroom was picked to work with that patterned tile.
This kind of Mediterranean patchwork tile is unforgiving to install. Every tile is a different pattern, so the layout has to balance the room visually — no dominant motif clumping in one corner, no repeats sitting next to each other, and consistent grout lines across a busy field.
Project Overview
The remodel packaged the full wet area — tub, tub surround, tub apron, side walls, and floor — into one coordinated design. The patterned tile is the design anchor; the marble-look large-format tile on the side walls and the wood-look plank floor are the calming counterweights.
The bathroom remodel included:
- Full demo of the existing tub surround, wall coverings, and floor
- Framing inspection at the wet walls and repair of any moisture-damaged material
- New cement board on every wet-area wall behind the tile
- Liquid waterproofing membrane over the cement board on wet walls
- Patterned encaustic-look ceramic tile across the full back wall of the tub — floor to ceiling
- Same patterned tile continued down the tub apron for a wrap-around effect
- Large-format marble-look ceramic tile on the side walls to balance the pattern
- Wood-look ceramic plank floor throughout the bathroom
- Precision layout so no two identical patterned tiles sit next to each other
- Consistent thin grout lines across the entire patterned field
- Recessed ceiling downlight over the tub area
- Chrome fixtures — handheld showerhead and single-lever tub valve
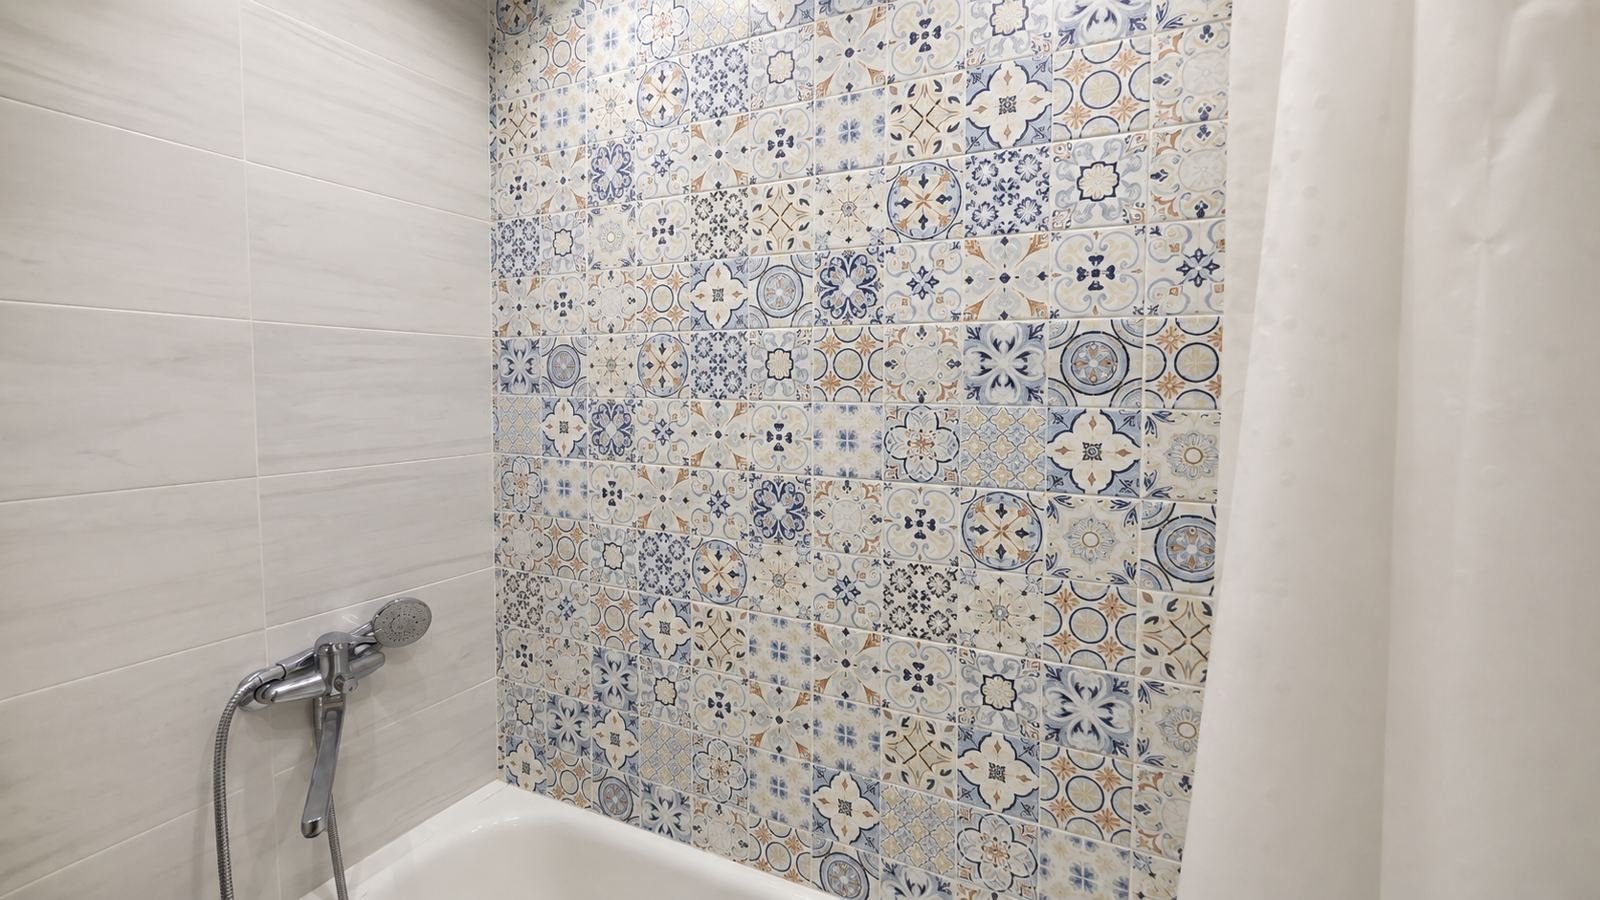
The finished bathroom reads warm and layered rather than flat. The patterned feature wall is the visual centerpiece; the marble-look side wall and wood-look floor keep the room grounded and prevent the pattern from overwhelming the space.
Why the Patterned Tile Choice Drives the Whole Design
Patterned encaustic-look tile has been a strong trend in modern bathrooms for a decade, and the reason is simple: on one wall, it does the work of wallpaper, art, and a color palette all at once. A single accent wall of this tile turns a small bathroom into a designed room.
The specific tile here is a factory-printed ceramic that mimics the look of hand-painted cement encaustic tile — Portuguese and Moroccan-style motifs mixed in a “patchwork” layout where every tile has a different pattern. The three big advantages of the ceramic version over real encaustic cement:
- No sealing required. Real encaustic cement needs a penetrating sealer applied before and after grout, and re-sealed every 1–2 years. Ceramic is glazed at the factory and needs no sealing.
- Water and stain resistant. Ceramic is inherently waterproof; encaustic cement absorbs and stains from soap, shampoo, and mineral deposits.
- Cost. The ceramic version is roughly 30–50% of the price per square foot compared to real encaustic cement, with a visual result that reads the same at normal viewing distance.
The trade-off is that the patterns are printed, so they lack the hand-made irregularity of true encaustic. In a full-height application like this one, the visual density of pattern makes that difference invisible.
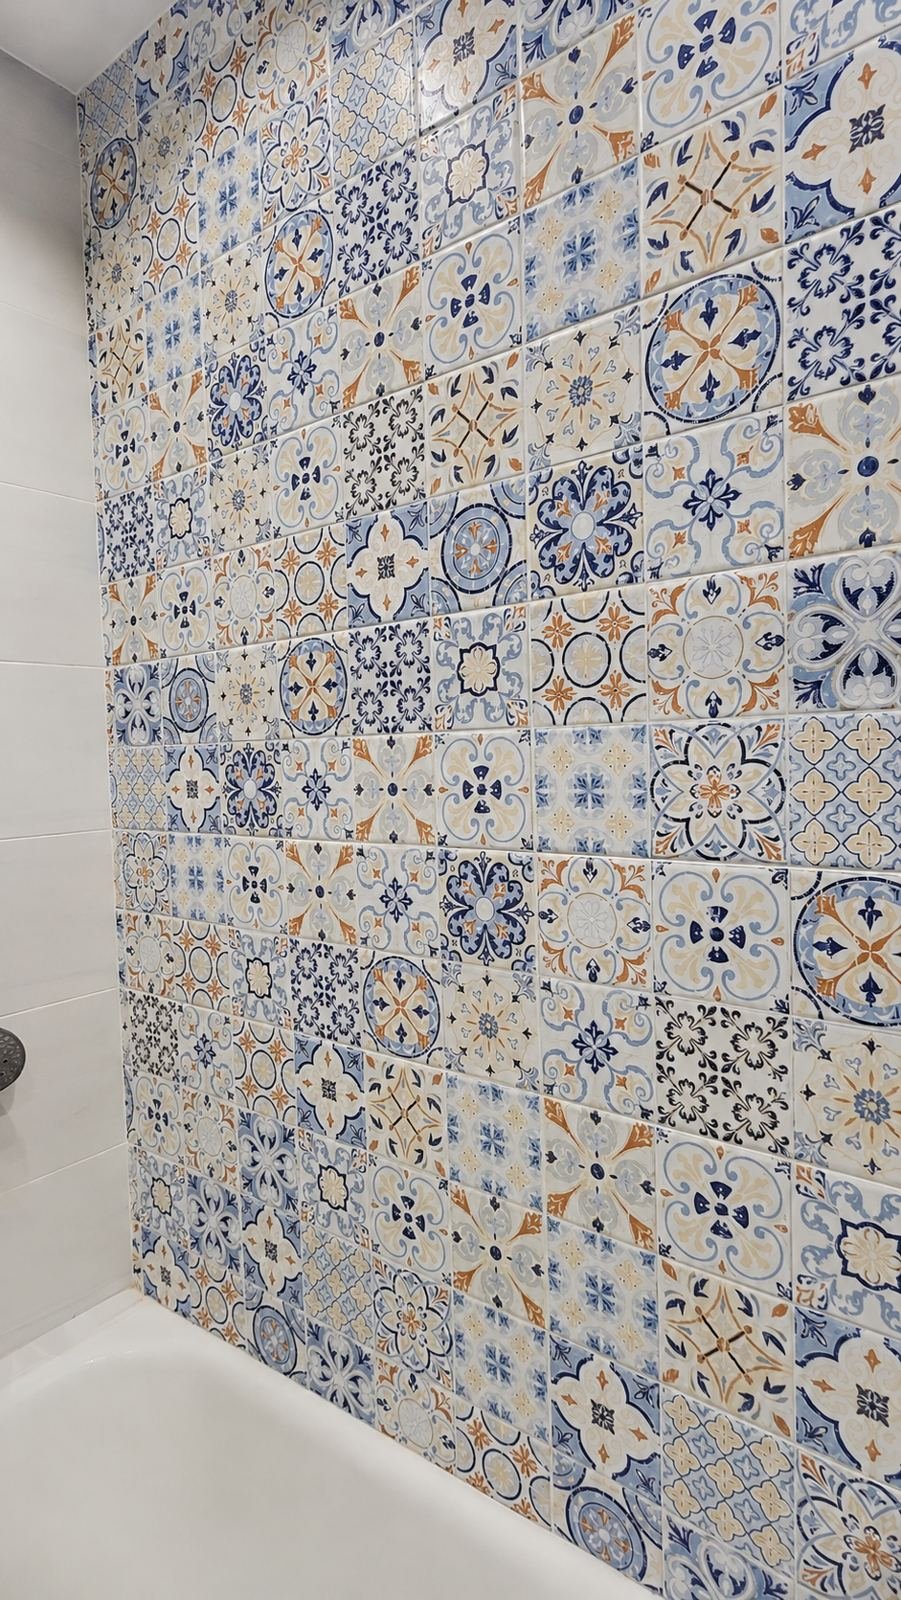
Layout Planning — the Part That Makes Patterned Tile Work
Buying a box of patterned “patchwork” tile is easy. Installing it so the finished wall looks intentionally random — instead of accidentally clumped — is where most DIY installs and cheap tile jobs fail.
On this project the layout was planned before a single tile went on the wall:
- Every tile from every box was laid out on the floor face-up in a full mock-up of the wall
- Duplicate patterns were flagged and separated across the field so no two identical patterns sit within eye-line of each other
- Strong-color patterns (heavy navy, heavy orange) were distributed evenly rather than clumped in one corner
- Adjustments made until the mock-up read as “random” — the human eye is very good at spotting patterns and clumps
- Tiles then numbered and installed in the planned sequence
Skipping this planning step is the fastest way to end up with a $2,000 tile job that looks like a $200 tile job. The tiles themselves are beautiful; the arrangement is where the craft is.
The Tub Apron — Wrapping the Pattern Continues the Design
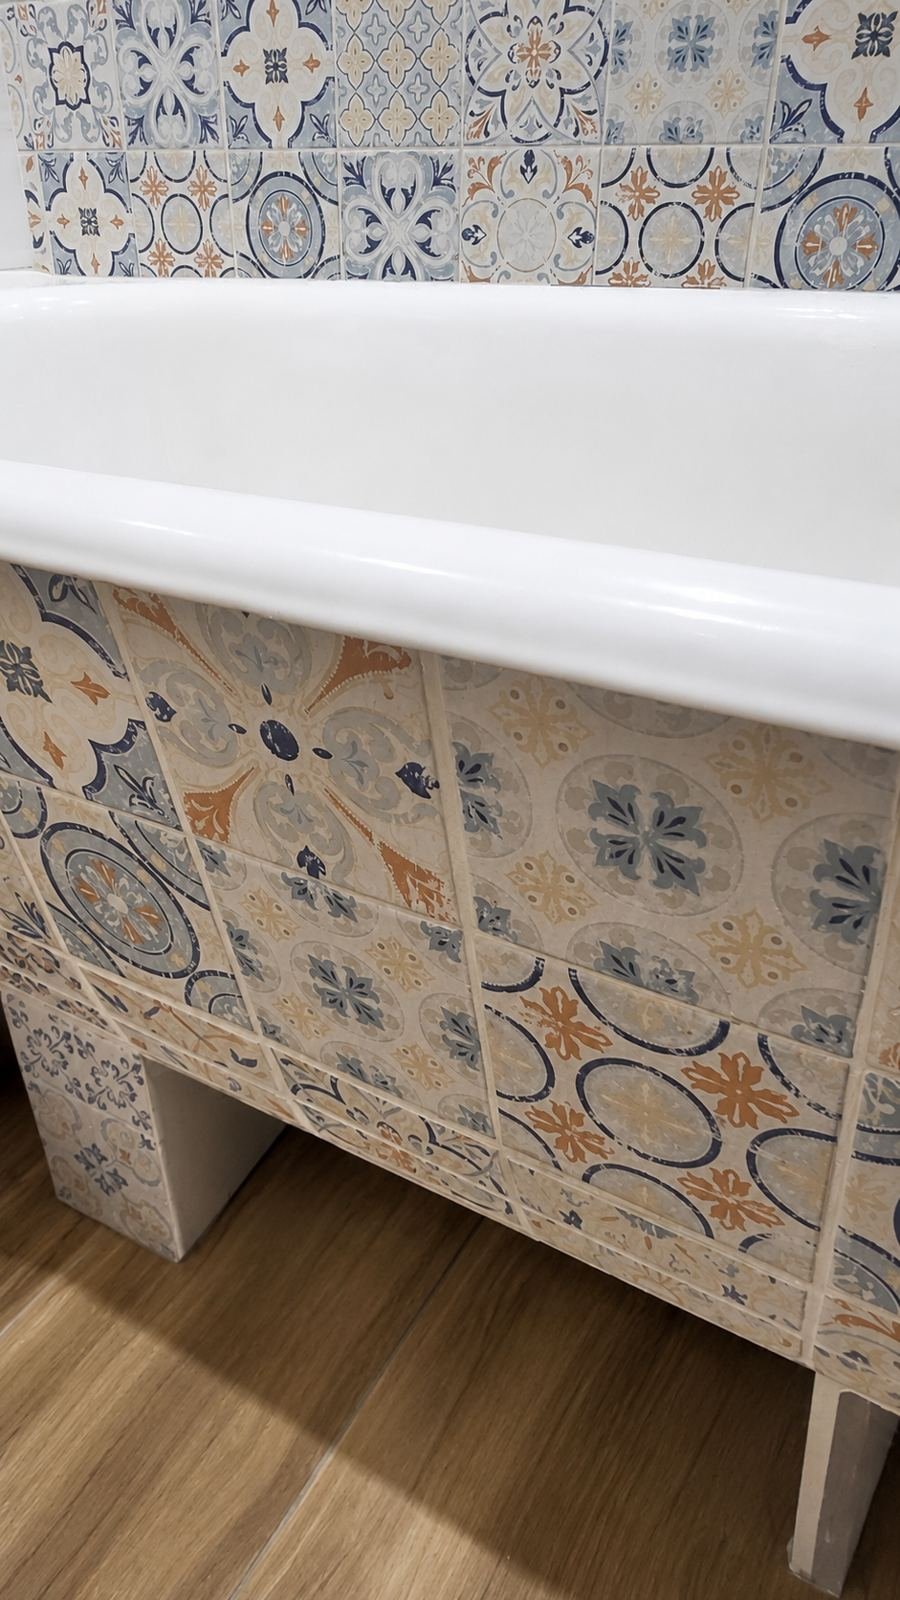
One of the small details that lifts this bathroom from “nice” to “designed” is the decision to continue the same patterned tile down the tub apron (the front-facing panel of the tub). Most tub installations either leave the apron as bare white acrylic or wrap it in a plain accent tile.
Wrapping the same patterned tile down the apron does three things:
- Connects the back wall visually to the floor — the eye reads the room as one design rather than “wall + tub”
- Makes the tub feel like a built-in furniture piece rather than a manufactured white box parked in the corner
- Gives the small bathroom a second surface of the pattern, which balances the tall back wall
This detail also takes real installation skill. The tub apron is not straight — it has legs and cutouts at the base — so every tile at the bottom had to be measured, cut, and set individually to fit around the tub’s shape.
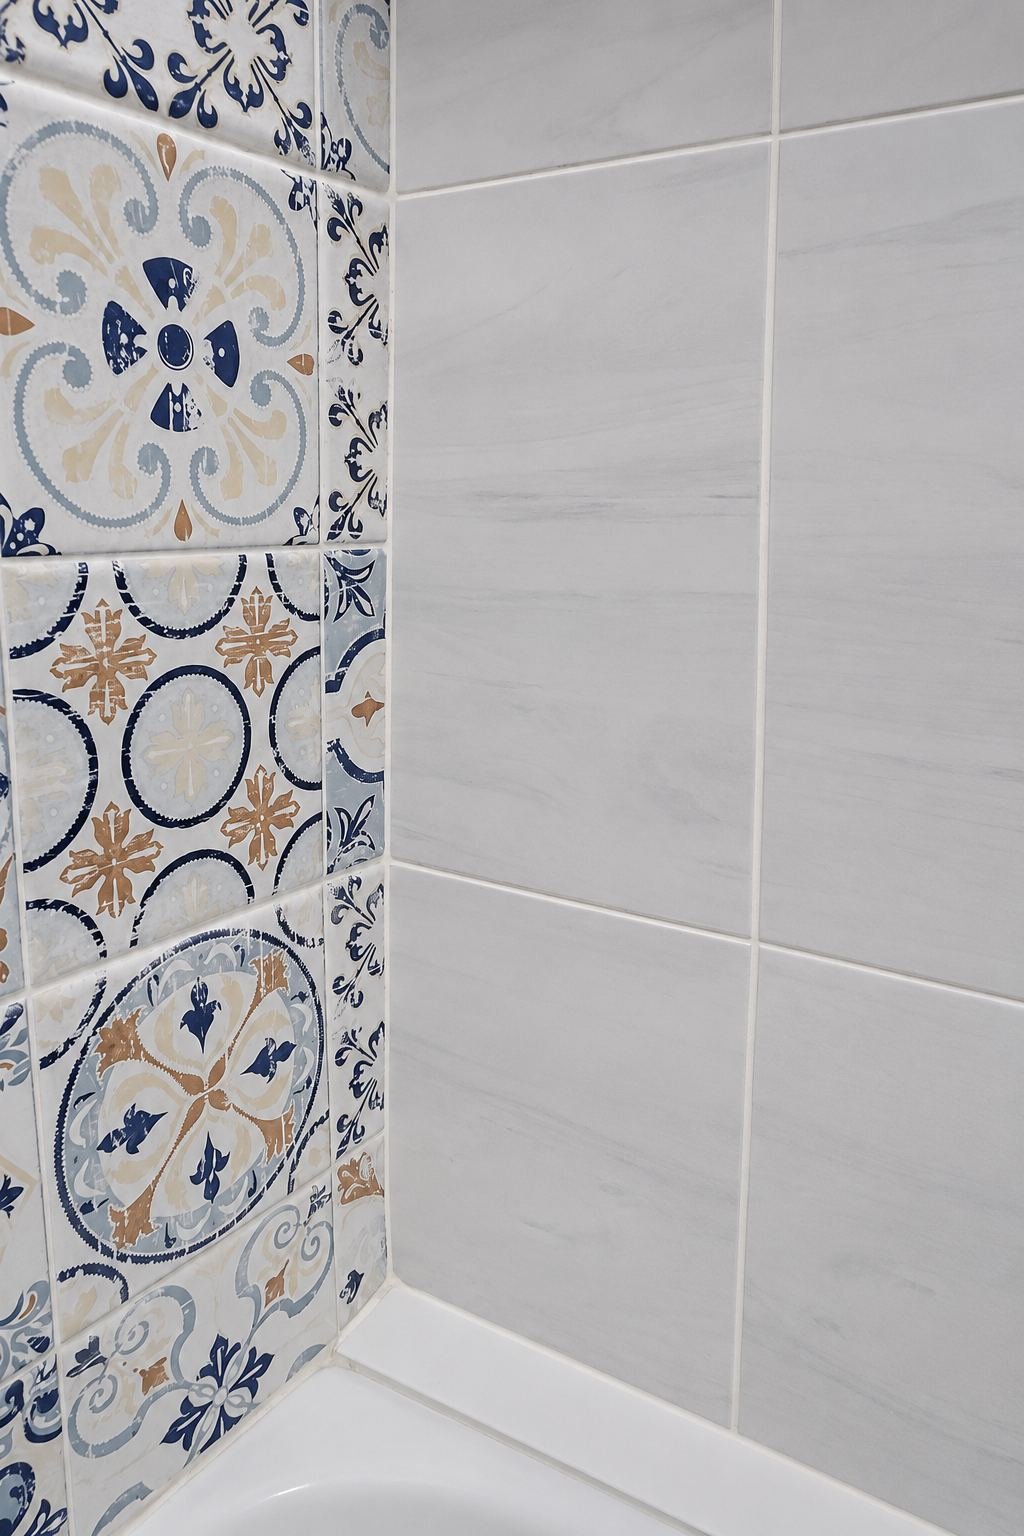
Marble-Look Side Walls
The two side walls of the tub are finished with a large-format marble-look ceramic tile in a light gray with soft veining. This is intentional design tension:
- The busy patterned tile in the middle is calmed by the quiet marble tile at the edges
- Large-format tile has fewer grout lines, which reads clean and modern next to the dense grout grid of the small patterned tile
- The neutral gray tone lets the color-heavy patterned tile stay the star of the room
Using the same busy pattern on all three walls would have been visually overwhelming in a small bathroom. This side-wall choice is what makes the pattern breathe.
Wood-Look Plank Floor
The floor is a wood-look ceramic plank tile in a warm honey oak tone. This is the third finish in the room, and it does two jobs:
- Warmth: the honey tones of the wood-look floor pull the warm-orange notes out of the patterned tile and connect them to the floor. Without the warm floor, the pattern would read colder and the room would feel less inviting.
- Durability: ceramic plank tile handles water, humidity, and daily wear better than real hardwood ever will. In a bathroom, real wood is a maintenance headache; wood-look ceramic gives the same visual with none of the problems.
The plank size chosen is a common 8″ × 48″ — long enough to read as real plank flooring, wide enough to install efficiently.
Cement Board and Waterproofing Behind the Tile
The visible tile work is 50% of the project. The other 50% is what you do not see — the cement board and waterproofing that make the tile last.
On this project the wet-wall assembly followed the correct sequence:
- Old surface demo down to the studs. Framing inspected for rot; any compromised studs or blocking replaced.
- Cement board installed on every wet-area wall — fastened at correct spacing, seams taped with alkali-resistant mesh, all seams thin-set filled.
- Liquid waterproofing membrane rolled over the entire cement board surface — two coats with proper dry time between passes, extended past every corner and up to the top of the tile field.
- Membrane dry-tested for pinholes; touched up as needed.
- Tile installed on the waterproofed cement board using modified thin-set.
Skipping the cement board step and installing tile directly onto drywall — a shortcut some fast bathroom flippers still take — is the single most common cause of tile that “mysteriously” comes off the wall within 5 years, or worse, mold and rot behind the tile within 2.
Grout Choice — the 5% of the Wall That Reads as 50%
Grout is a small percentage of the surface area and a huge percentage of the visual read. On a patterned tile install especially, grout color makes or breaks the finished look.
On this project the grout was chosen slightly warmer than pure white — a soft off-white that:
- Preserves the individual patterns without letting the grout lines shout
- Blends the patterned field into a “wall” rather than a “grid of tiles”
- Ties visually to the wood-look plank floor grout so the room reads cohesive
Grout is sealed after cure to prevent staining and to keep it from absorbing moisture from the tub area.
Fixtures — Chrome Kept Deliberately Quiet
Every fixture on this bathroom is chrome — the tub valve, the handheld shower on its slide bar, the shower hose, and the drain. Chrome was chosen intentionally to stay quiet:
- Brass or matte black hardware would have competed with the patterned tile for attention
- Chrome recedes visually and lets the pattern be the star
- Chrome is the most durable finish for wet-area hardware and the easiest to clean of mineral buildup
The tub valve is a single-lever thermostatic — modern function, minimal visual presence.
Ceiling and Lighting
The ceiling is finished in matte white with a single recessed LED downlight positioned over the tub. In a small bathroom this is the right choice:
- Recessed light stays out of the way and does not compete with the wall pattern
- Warm-white color temperature (2700–3000K) makes the tile colors read correctly and keeps the room feeling residential rather than clinical
- Positioning over the tub — not centered in the ceiling — puts the light where it is needed for bathing and shaving in the mirror
How Long a Patterned Tile Bathroom Remodel Takes
A patterned-tile bathroom remodel of this scope — full demo, cement board, waterproofing, layout planning, tile install, grout, fixtures — is typically a 2 to 3 week project.
The layout-planning step for patterned tile adds real time compared to a solid-color tile install. Where a solid-color subway install can start setting tiles the day the cement board is dry, a patterned patchwork install needs a full day just to lay out the pattern before any adhesive comes out.
Rough timeline:
- Days 1–2: demo, protection, framing inspection
- Days 3–4: any framing/plumbing corrections, cement board install
- Day 5: liquid waterproofing membrane, two coats
- Day 6: full tile layout mock-up on the floor, pattern balancing, numbering tiles
- Days 7–10: tile install — back wall, apron, side walls, floor
- Day 11: grout, seal
- Days 12–14: fixtures, tub trim, plumbing final, cleanup, walkthrough
What to Watch For When Hiring a Contractor for Patterned Tile
Before hiring anyone specifically for a patterned or encaustic-look tile install, look at their prior work for:
- Balanced pattern distribution: ask for close-up photos of previous patterned tile walls they have done. No two identical patterns should sit next to each other. Heavy-color tiles should be spread across the field, not clumped.
- Consistent grout lines: patterned tile drift is very visible because the pattern edges do not match adjacent tiles perfectly. Small grout inconsistencies show more than on solid-color tile.
- Cement board photos: ask what they use behind the tile in wet areas. If the answer is “we tile directly on drywall” — walk away.
- Waterproofing membrane: RedGard, Kerdi, or equivalent — not optional in a wet area.
- Tub apron treatment: can they wrap tile around a tub apron with clean cuts around the base and legs? This is a real skill test.
- Grout color selection: did they discuss grout color with prior clients or just default to white? Grout on patterned tile especially needs a deliberate choice.
Common Pitfalls on DIY or Cheap Patterned Tile Jobs
- Tile boxes opened and installed straight without any layout planning — identical patterns clumping in one area
- All the strong-color tiles ending up on one side of the wall because they were on top of the box
- Tile installed directly on drywall behind a tub — waiting-to-fail moisture damage
- Grout too bright white against warm-tone patterns — makes the tile look cheap
- Grout too dark or matching the tile — kills the individual patterns and makes the wall look muddy
- Tub apron left plain white when the back wall gets the pattern — visually disconnected
- Cheap chrome fixtures with rough plating that pits within a year in a wet area
- Corner where patterned tile meets plain tile handled with a bulky metal trim strip instead of a clean caulk line or mitered joint
Design Ideas for Patterned Tile in Los Angeles Bathrooms
Patterned encaustic-look tile is versatile beyond a tub feature wall. Some ways we use it in Los Angeles bathrooms:
- Full tub surround (as on this project) — the pattern wraps three walls at bath height
- Behind the vanity only — a smaller accent that works in bathrooms with existing tub tile
- Powder-room floor — a full floor of pattern with white walls is a very strong small-bathroom statement
- Shower niche — the pattern used only inside the built-in niche for a small “jewel” moment
- Kitchen backsplash — the same tile works between counter and upper cabinets for a Mediterranean-style kitchen
Which application makes sense depends on the size of the bathroom, the existing finishes staying in the room, and how much pattern the client wants to live with day-to-day.
Patterned Tile Bathroom Remodels in Los Angeles
At ProHands Home Improvement, we design, source, and install patterned tile bathrooms for homes throughout Los Angeles, Glendale, Burbank, Pasadena, and surrounding areas. We handle the whole scope in-house — demo, framing, plumbing, electrical, cement board, waterproofing, layout planning, tile install, grout, fixtures — one crew, one point of contact, one coordinated design.
We help with:
- Full bathroom remodels with patterned encaustic-look tile
- Solid-color subway, hex, and mosaic tile installations
- Tub surround, tub apron, and shower surround tile
- Wood-look ceramic plank floor installation
- Large-format marble-look and stone-look tile
- Feature-wall accents in powder rooms and half baths
- Cement board substrate and RedGard/Kerdi waterproofing
- Grout selection, sealing, and periodic re-grout
- Chrome, brass, brushed nickel, or matte black fixture packages
- Bathroom electrical — GFCI outlets, vanity lighting, sconces, ceiling downlights, bath fan replacement
- Vanity and mirror install
Conclusion
This bathroom remodel in Los Angeles combined a specific design idea — a patterned encaustic-look ceramic tile as a full tub feature wall — with the technical work that makes tile last: cement board substrate, waterproofing membrane, careful pattern-balancing at layout, thin consistent grout lines, and matched fixture and floor finishes. The result is a warm, layered bathroom where the pattern is the star and every other finish works to support it.
If you are planning a bathroom remodel in Los Angeles, Glendale, Burbank, Pasadena or a nearby area — and you want a bathroom with real character rather than a generic modern look — ProHands Home Improvement can help.
Call or text ProHands Home Improvement: (818) 401-7766
Send photos and dimensions of your bathroom and we can walk through what a patterned-tile remodel would look like, what tile options make sense for your space, and provide an estimate.
Free Estimate · Los Angeles · Glendale · Burbank · Pasadena