The Art of Crafting Wood and Epoxy Resin Tables
Wood and epoxy resin tables have become a sought-after trend in modern interior design, blending natural wood grain with the sleek, glass-like finish of epoxy resin. These tables are not only visually stunning but also highly durable and customizable. If you're considering investing in a handcrafted wood and resin table or want to try making one yourself, this guide will walk you through everything you need to know!
ARTICLES
3/19/20253 min read
Why Choose Wood and Epoxy Resin Tables?
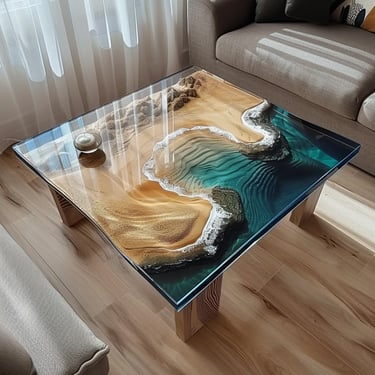
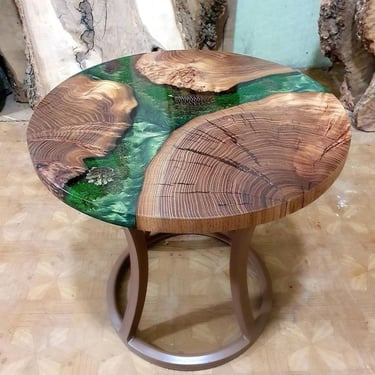
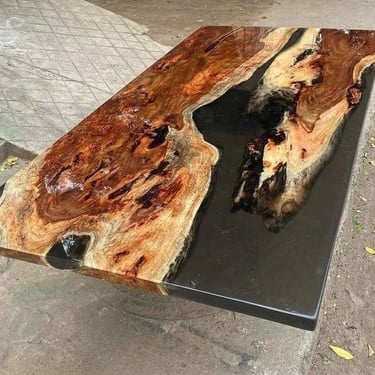
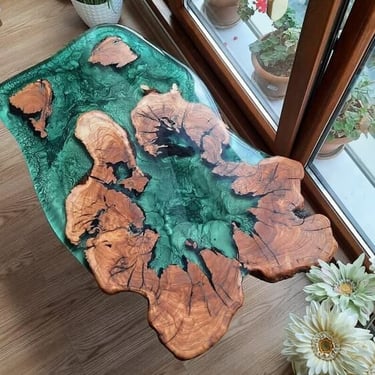
✔ Unique Aesthetic – Each table is one-of-a-kind, showcasing organic wood patterns combined with crystal-clear or colored resin.
✔ Durability – Epoxy resin protects the wood from moisture, scratches, and UV damage.
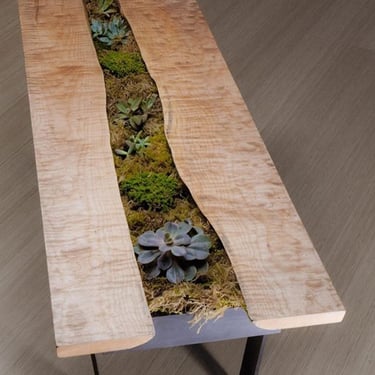
✔ Customization – Choose from different wood species, resin colors, finishes, and embedded elements like stones, shells, or LED lights.
✔ Versatility – Works as a dining table, coffee table, desk, or even countertops.
✔ Sustainability – Crafted using reclaimed or live-edge wood, making it an eco-friendly furniture option.
✔ Easy Maintenance – Resistant to spills, stains, and daily wear-and-tear, requiring minimal upkeep.
Materials and Tools Required
To create a wood and epoxy resin table, you’ll need the following materials:
Wood Selection:
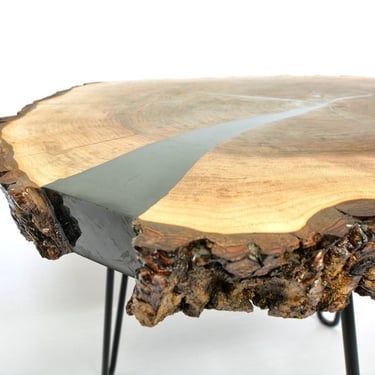
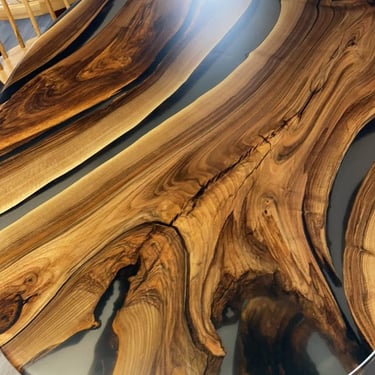
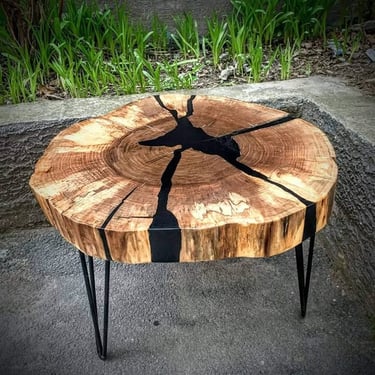
Live-edge slabs (walnut, oak, maple, acacia) for a natural look
Reclaimed wood for a rustic appearance
Kiln-dried wood to prevent warping and cracks
Hardwood varieties for better durability and strength
Epoxy Resin:
High-quality, UV-resistant epoxy for a crystal-clear finish
Pigments or metallic powders for custom colors and effects
Deep-pour epoxy for creating river tables or thick layers
Fast-curing epoxy for thin layers and quick projects
Additional Supplies:
Mold or table frame to contain the resin
Mixing containers and stirring sticks for accurate measurements
Heat gun or torch to remove air bubbles
Sandpaper (ranging from coarse to fine grit) and polish for finishing
Protective gloves, goggles, and respirator for safety
Wood clamps and leveling tools for precise assembly
Step-by-Step Guide to Making a Wood and Epoxy Table
Step 1: Preparing the Wood
Choose a wood slab that suits your desired table size and style.
Remove bark and sand the surface to smooth out rough edges and remove debris.
Seal the wood with a thin layer of epoxy or sanding sealer to prevent air bubbles from forming.
Fill any cracks, knots, or voids with clear or colored epoxy resin to enhance the look.
Step 2: Building the Mold
Construct a mold using melamine boards or sealed plywood to contain the resin.
Seal the edges with silicone caulk to prevent leaks.
Apply a mold release agent (such as furniture wax) for easy removal after curing.
Ensure the mold is level to prevent uneven resin distribution.
Step 3: Mixing and Pouring the Epoxy Resin
Measure and mix the epoxy resin according to the manufacturer’s instructions.
Add pigments or dyes to create custom river table effects or a transparent look.
Pour the resin into the mold in layers, allowing each layer to set before adding more.
Use a heat gun or torch to remove bubbles and ensure clarity.
Embed decorative elements such as metallic flakes, shells, stones, or LED lights for added aesthetics.
Step 4: Curing Process
Allow the resin to cure for at least 24-72 hours in a dust-free, temperature-controlled environment.
Avoid excessive heat or moisture exposure during curing, as it can cause imperfections.
Check the manufacturer’s curing guidelines for ideal drying conditions.
Step 5: Removing and Finishing
Once fully cured, carefully remove the table from the mold.
Sand the entire surface using progressively finer grits (starting from 80-grit and finishing at 3000-grit for a glass-like polish).
Buff and polish for a high-gloss, semi-gloss, or matte finish.
Apply a protective coat of polyurethane, hard wax oil, or furniture-grade epoxy for durability.
Step 6: Attaching the Table Base
Choose a base that complements the design – metal legs, wooden trestles, or a minimalist frame.
Secure the base using strong fasteners and ensure proper weight distribution.
Consider adjustable leg levelers for stability on uneven floors.
Tips for a Flawless Epoxy Resin Table
✔ Use deep-pour epoxy for thick layers to avoid excessive heat buildup and cracks.
✔ Work in a dust-free, ventilated workspace to prevent contamination.
✔ Seal all edges properly to avoid resin leaks and warping.
✔ Experiment with color pigments and textures for unique designs.
✔ Allow sufficient curing time before heavy use to prevent damage.
✔ Avoid direct sunlight exposure to prevent epoxy discoloration over time.
✔ Use rubber feet or felt pads under the table legs to prevent floor scratches.
Where to Use Epoxy Resin Tables?
These tables fit seamlessly into a variety of settings, including:
Dining rooms – Adds a modern and luxurious touch.
Living rooms – Creates a stunning coffee table centerpiece.
Office spaces – Provides an elegant yet functional work surface.
Cafes and restaurants – Adds an artistic and unique furniture element.
Outdoor patios – If properly sealed, resin tables withstand outdoor conditions.
Get Your Custom Wood and Epoxy Table Today!
Looking for a handcrafted epoxy resin table tailored to your space? We create custom wood and resin furniture that blends natural beauty with modern craftsmanship.
📞 Call or text: 818-401-7766
📍 Serving Glendale, Burbank, Pasadena, Los Angeles, North Hollywood, West Hollywood, Sherman Oaks, Studio City, and surrounding areas.
Contact us today for a free consultation and bring your dream table to life!