Step-by-Step Guide: Drywall Ceiling Repair with Orange Peel Texture Application
Ceiling damage can be a significant eyesore in any home. This step-by-step guide will show you how our team at ProHands Handyman Services tackles drywall ceiling repair and finishes it with a beautiful orange peel texture.
OUR WORKSINTERNAL REPAIRSDRYWALLRESTORATIONPAINTING & STAINING
1/3/20252 min read
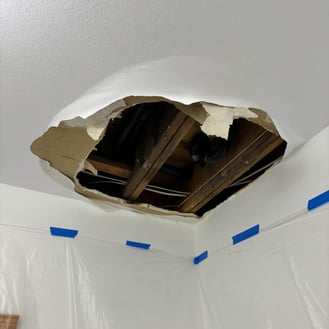
Step 1: Assess the Damage
Before beginning, inspect the area for the extent of the damage. Check for any underlying issues like water leaks or structural problems that must be addressed before repairs.
1. Inspect the damaged ceiling for cracks, holes, or loose drywall.
2. Identify the cause of the damage and resolve it (e.g., repair leaks or reinforce framing).
Step 2: Prepare the Area
Protect the surrounding area to avoid damage and ensure a clean working space.
1. Cover furniture and floors with plastic sheets or drop cloths.
2. Seal off the work area using painter’s tape and plastic sheeting to prevent dust from spreading.
Step 3: Remove the Damaged Drywall
Carefully cut out the damaged section of drywall.
1. Use a utility knife or saw to create clean edges around the damaged area.
2. Remove any loose drywall and debris.
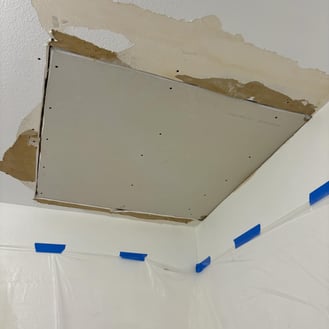
Step 4: Cut and Fit New Drywall
Replace the damaged section with a new piece of drywall.
1. Measure the cutout section and cut a drywall piece to match.
2. Secure the new drywall to the ceiling joists using drywall screws or nails.
3. Ensure the patch is flush with the surrounding surface.
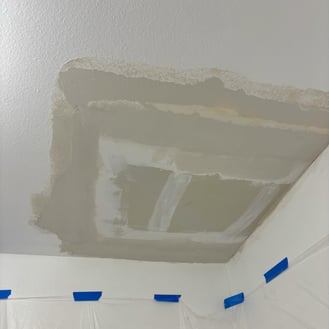
Step 5: Tape and Mud the Joints
Create a seamless connection between the old and new drywall.
1. Apply drywall tape over the seams.
2. Spread a thin layer of joint compound over the tape, feathering the edges for a smooth transition.
3. Allow the compound to dry completely (approximately 24 hours).
Step 6: Sand and Reapply Compound
Achieve a smooth surface by sanding and applying additional layers of compound.
1. Use fine-grit sandpaper to smooth the dried joint compound.
2. Apply a second coat of compound, feathering the edges further.
3. Repeat the sanding and application process if needed until the area is even.
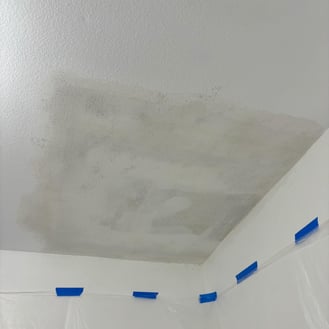
Step 7: Apply the Orange Peel Texture
Recreate the textured finish to blend with the existing ceiling.
1. Use a spray texture machine or aerosol texture spray designed for orange peel.
2. Adjust the nozzle to achieve the desired texture size.
3. Test the spray on a scrap surface before applying to the ceiling.
4. Spray the texture evenly over the repaired area, blending it into the surrounding surface.
5. Allow the texture to dry thoroughly.
Step 8: Prime and Paint
Finish the ceiling with primer and paint to match the existing color.
1. Apply a coat of drywall primer over the repaired area to ensure uniform paint absorption.
2. Once dry, use a roller or brush to apply ceiling paint.
3. Feather the paint into the surrounding area for a seamless finish.
Tips for Success:
• Use proper safety equipment, such as goggles and a dust mask, when cutting drywall and sanding.
• Work in a well-ventilated area to minimize dust and fumes.
• Take your time during the texturing process to ensure it matches the original finish.
This step-by-step guide will help you restore your drywall ceiling to its original condition with a flawless orange peel texture, providing a durable and aesthetically pleasing result.
We offer professional services for ceiling repair, including restoring damaged drywall and applying orange peel texture.
This project was fully implemented by our team, from removing the damaged areas to final painting. If your ceiling needs repair, we are ready to help you restore it to perfect condition.
Contact Information:
• ProHands Handyman Services
• Phone: 818-401-7766
• Website: www.prohandshandyman.com
• Service Areas: Glendale, Burbank, Pasadena, and surrounding areas.
We guarantee quality and professionalism at every stage of the work. Call us for a free consultation and cost estimate!