
Project Overview: Installing Decorative Wall Paneling
Adding decorative wall paneling, such as beadboard, can transform a plain wall into a stylish and elegant feature. Here’s how we enhanced this room with beautifully crafted paneling for a clean and sophisticated look.
OUR WORKSINTERNAL REPAIRSPLYWOOD
1/18/20251 min read
Before
• Condition: The walls were bare and lacked visual interest or dimension.
• Challenges: Precise measurements and seamless integration of the paneling with existing features like windows, electrical outlets, and baseboards.
Steps We Followed
1. Preparation
• Cleared the area and cleaned the walls to ensure proper adhesion and fit.
• Measured the walls and marked the placement for the paneling.
2. Paneling Installation
• Carefully cut beadboard panels to fit around windows, outlets, and corners.
• Applied adhesive and secured the panels to the wall using finishing nails for a sturdy installation.
3. Trim Work
• Installed trim pieces along the top edge of the paneling to create a smooth transition and a polished finish.
• Added baseboard trim for a cohesive look.
4. Painting
• Applied primer and painted the paneling and trim with a durable, washable finish for long-lasting beauty.
• Ensured even coats and smooth edges for a professional appearance.
5. Finishing Touches
• Inspected every detail, ensuring that all seams and edges were flawless.
• Cleaned the area to leave the room ready for immediate use.
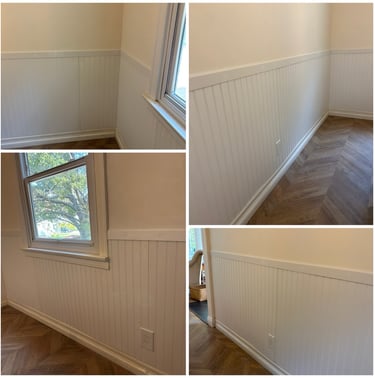
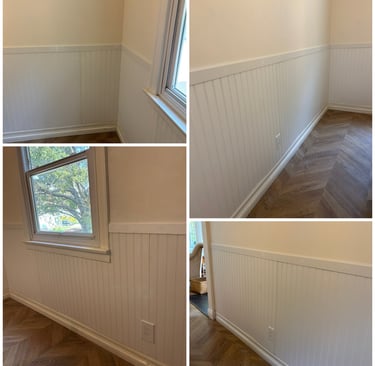
After
The finished paneling brings:
• Aesthetic Appeal: The beadboard adds depth and character, enhancing the room’s overall design.
• Practical Benefits: Durable and easy-to-clean surfaces, perfect for high-traffic areas or family spaces.
• Custom Fit: Precision installation around windows and outlets for a seamless look.
Elevate your home’s style with professional paneling installations. Contact ProHands Handyman for expert craftsmanship:
• Phone: 818-401-7766
• Website: www.prohandshandyman.com
• Email: info@prohandshandyman.com