
How to Repair Vinyl Siding
Vinyl siding is a popular choice for homeowners due to its durability, low maintenance, and cost-effectiveness. However, over time, it can crack, warp, or become damaged due to weather conditions, impact, or other external factors. Properly repairing vinyl siding not only maintains the appearance of your home but also protects it from moisture, pests, and energy loss.
ARTICLES
2/21/20252 min read
Tools and Materials Needed:
Replacement vinyl siding panel (matching color and style)
Utility knife
Zip tool (for vinyl siding removal)
Hammer and nails
Caulking (color-matched to siding)
Measuring tape
Pencil or marker
Safety gloves and glasses
Step-by-Step Guide:
1. Assess the Damage
Inspect the damaged area thoroughly to determine the extent of the repair needed. Identify whether a small patch is sufficient or if the entire panel needs to be replaced.
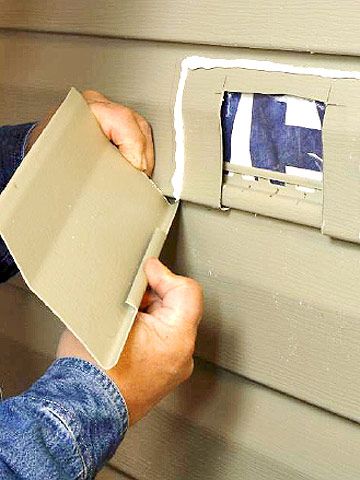
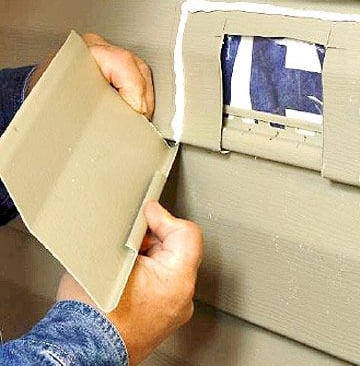
2. Remove the Damaged Siding
Use a zip tool to unlock the siding panel above the damaged one.
Slide the zip tool under the bottom edge of the panel and gently pull downward to unlock it from the panel below.
Carefully remove the nails securing the damaged siding panel using a hammer or pry bar.
3. Measure and Cut Replacement Panel
Measure the length of the damaged section using a measuring tape.
Cut a new vinyl siding piece to the required length with a utility knife.
Make sure to leave a small gap for expansion and contraction due to temperature changes.
4. Install the New Siding Panel
Slide the replacement panel into place by aligning the bottom edge with the panel below.
Secure the new panel by nailing it loosely (don’t hammer the nails too tightly to allow for expansion).
Ensure the nails are placed in the center of the nail slots.
5. Lock the Panels Together
Use the zip tool to lock the top edge of the new panel with the bottom edge of the panel above.
Press firmly to ensure a secure fit.
6. Seal and Finish
Apply color-matched caulk to seal any gaps or joints to protect against water infiltration.
Clean up the area and check the repair for a seamless finish.
Tips for Success:
Always wear safety gloves and glasses when handling sharp tools.
Choose a dry, mild day for the repair to avoid warping or buckling of the siding.
Take a small sample of the existing siding to the store to match the color and style accurately.
When to Call a Professional:
If you encounter extensive damage or structural issues, it’s best to seek help from a professional siding contractor. Improper installation can lead to moisture problems, mold growth, and energy loss.
Contact Us:
At ProHands Handyman, we specialize in vinyl siding repairs and home maintenance services. Contact us today at 818-401-7766 or visit our website www.prohandshandyman.com for a free estimate and professional service.
Maintain the beauty and integrity of your home with expert vinyl siding repairs!