How to Repair Drywall: A Step-by-Step Guide (small-large)
Drywall repair can seem intimidating at first, but with the right steps and tools, you can restore your walls to their original condition. Whether it’s a small nail hole or a large gash, here’s a comprehensive guide to fixing drywall damage.
ARTICLES
1/21/20252 min read


Step 1: Assess the Damage
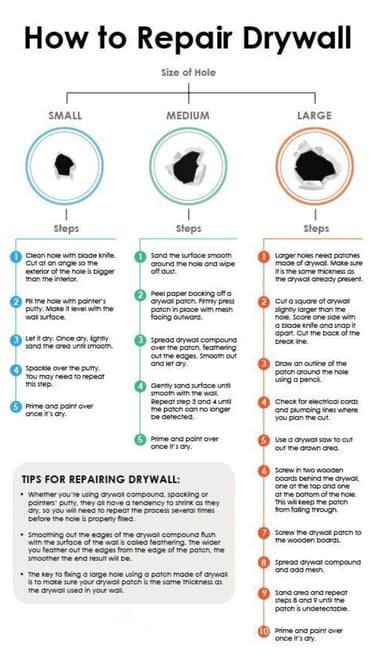
Determine the size of the hole or damage. Drywall repairs typically fall into three categories:
Small Holes (e.g., nail holes or minor dents)
Medium Holes (larger punctures or holes)
Large Holes (significant damage requiring patches)
Small Hole Repair
Clean the Hole:
Use a blade or utility knife to clean the edges. Cut at an angle so the exterior of the hole is larger than the interior.
Fill the Hole:
Apply painter’s putty into the hole and smooth it out level with the wall surface.
Let it Dry:
Once dry, lightly sand the area until smooth.
Apply Spackle:
Cover the putty with spackle. Repeat this step if needed.
Prime and Paint:
Prime the repaired area and repaint to match the wall.
Medium Hole Repair
Sand the Surface:
Smooth the edges around the hole and remove any loose drywall.
Apply a Patch:
Peel the paper backing off a drywall patch and firmly press it over the hole, ensuring the mesh faces outward.
Spread Drywall Compound:
Feather the compound outward over the patch edges. Let it dry and smooth it with sandpaper.
Repeat as Needed:
Add more compound and sand until the patch blends seamlessly.
Prime and Paint:
Finish the repair by priming and painting the area.
Large Hole Repair
Cut a Patch:
Use a drywall saw to cut a square patch slightly larger than the hole.
Prepare the Wall:
Check for electrical wires or plumbing behind the wall. Mark the patch area using a pencil and cut out the section.
Install Support Boards:
Screw two wooden boards inside the hole, one at the top and one at the bottom, to secure the patch.
Attach the Patch:
Screw the drywall patch onto the wooden boards.
Add Mesh and Compound:
Place mesh tape over the seams and spread drywall compound over it. Smooth out the compound and let it dry.
Sand and Repeat:
Sand the area and reapply compound as needed for a smooth finish.
Prime and Paint:
Complete the repair by priming and painting the area.
Pro Tips for Drywall Repair
Feathering: Ensure the edges of the compound are feathered out for a seamless blend.
Dry Time: Allow ample drying time between layers of compound to prevent shrinkage.
Matching Thickness: Use drywall patches that match the thickness of your existing wall.
By following these steps, you can repair drywall holes of any size like a pro. Whether you’re dealing with minor damage or major repairs, this guide ensures a clean and polished finish.
For professional drywall repair services in Glendale, Burbank, Pasadena, and surrounding areas, contact ProHands Handyman. Call us at 818-401-7766 or visit www.prohandshandyman.com to get a free estimate today!
