
How to Properly Align Flooring with Light Sources
When installing flooring, one crucial detail that often gets overlooked is the alignment of the planks in relation to the primary light source. This can significantly impact the overall appearance of your floor and the perception of the room. Here’s a simple guide to ensure your flooring installation is done right.
ARTICLES
1/21/20251 min read
The Importance of Direction
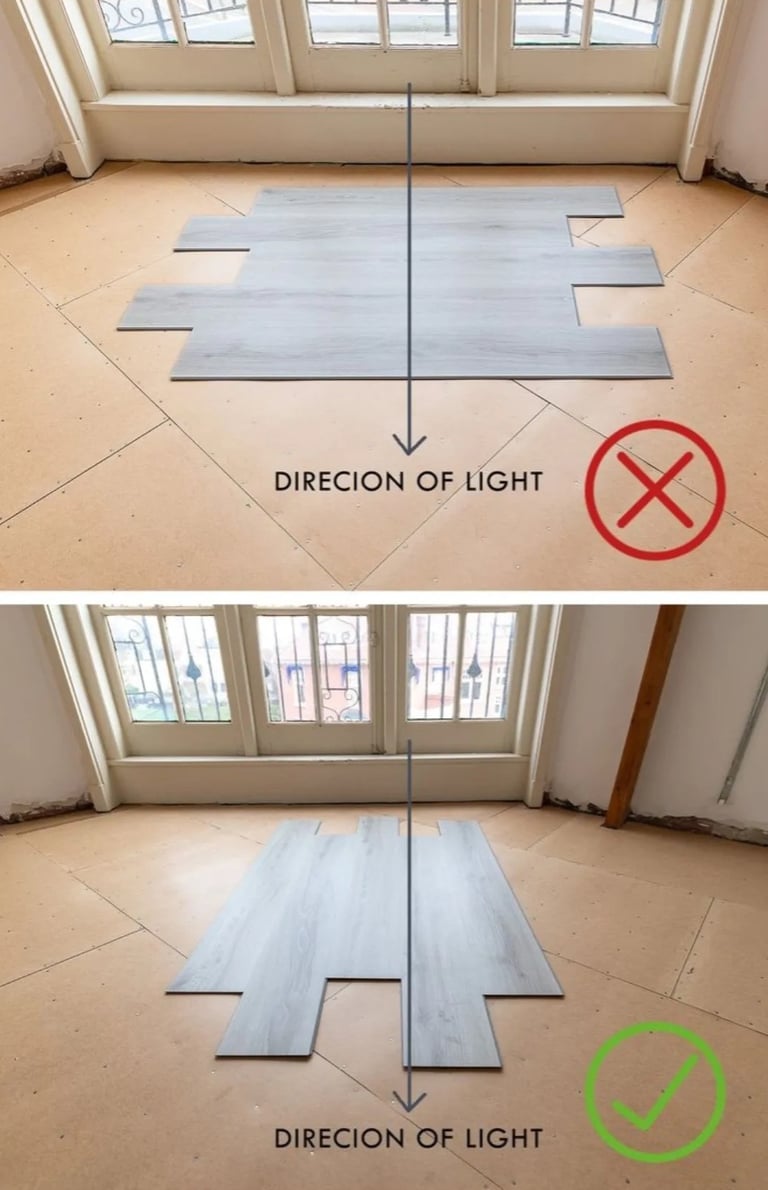
Natural light coming through windows highlights every detail of the flooring, including seams and textures. Installing the planks parallel to the direction of light ensures a smooth and visually pleasing effect. Conversely, laying them perpendicular to the light source can make seams and shadows more noticeable, detracting from the aesthetic appeal.
Correct Alignment Steps
1. Identify the Primary Light Source: Before beginning installation, determine where the most light enters the room. This could be from large windows, sliding glass doors, or skylights.
2. Lay Planks Parallel to the Light: Arrange the planks so they run in the same direction as the light flows. This minimizes visible seams and creates a unified look.
3. Test the Layout: Before committing, place a few planks on the floor in the intended direction. Observe how the light interacts with them at different times of the day.
Benefits of Proper Alignment
• Enhanced Room Appearance: The flooring will appear more seamless and professional.
• Highlighting Natural Features: Proper alignment showcases the texture and grain of the planks beautifully.
• Illusion of Space: In smaller rooms, following the light direction can make the space feel larger and more open.
By taking a little extra time to plan your installation direction, you can transform the look and feel of your room.
For professional flooring installation, reach out to ProHands Handyman Services:
• Phone: 818-401-7766
• Website: www.prohandshandyman.com