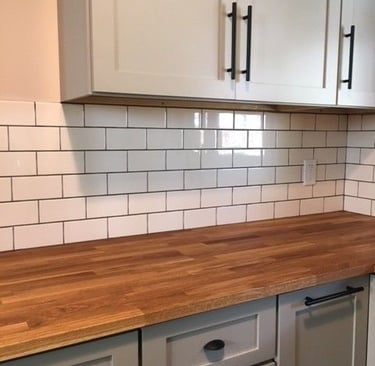
How to Install a Tile Backsplash in Your Kitchen
A tile backsplash is a stylish and practical way to protect your kitchen walls from spills and splashes while enhancing the overall look of your space. Whether you choose classic subway tiles, mosaic, or bold patterns, a well-installed backsplash can transform your kitchen. Here’s a step-by-step guide to installing a tile backsplash like a pro.
ARTICLES
3/18/20252 min read

Benefits of a Tile Backsplash
✔ Protects walls from moisture, grease, and stains.
✔ Enhances aesthetics with various designs, colors, and textures.
✔ Increases home value with a durable and stylish update.
✔ Easy to clean – just wipe down with a damp cloth.
Tools & Materials Needed
🔹 Tiles (ceramic, glass, porcelain, or stone)
🔹 Tile adhesive or thin-set mortar
🔹 Notched trowel for spreading adhesive
🔹 Tile spacers for even gaps
🔹 Tile cutter or wet saw for precision cuts
🔹 Grout and grout float
🔹 Caulk and caulk gun
🔹 Sponge and bucket for cleanup
🔹 Level and measuring tape
Step-by-Step Installation Process
1. Prepare the Surface
Clean the wall thoroughly and remove any grease or dust.
Ensure the surface is smooth and even.
Apply a primer if needed for better adhesion.
2. Plan the Layout
Measure the area and dry-fit the tiles before applying adhesive.
Mark a level reference line to keep tiles straight.
Use tile spacers to maintain consistent gaps.
3. Apply the Adhesive
Spread thin-set mortar with a notched trowel.
Work in small sections to prevent drying out.
Press each tile firmly into place.
4. Cut Tiles to Fit
Use a tile cutter or wet saw for precise edges.
Cut around outlets and corners as needed.
Smooth rough edges with a sanding stone.
5. Let the Tiles Set
Allow adhesive to dry for at least 24 hours before grouting.
6. Apply Grout
Spread grout over the tiles using a grout float.
Work diagonally to fill the gaps evenly.
Wipe excess grout with a damp sponge.
Let it cure before final cleaning.
7. Seal & Finish
Apply caulk along the edges where the backsplash meets the counter.
Seal grout if necessary for extra protection.
Polish the tiles for a flawless finish.
Pro Tips for a Perfect Tile Backsplash
✔ Use light-colored grout for a clean look, or dark grout for contrast.
✔ Measure twice, cut once – precision is key.
✔ If new to tiling, start from the center and work outward for balance.
✔ Consider peel-and-stick tiles for a quick and easy DIY option.
Need Professional Tile Installation?
Save time and ensure a flawless backsplash with our expert services! ProHands Handyman specializes in tile installation, grouting, and finishing to give your kitchen a polished, professional look.
📞 Call or text: 818-401-7766
📍 Serving Glendale, Burbank, Pasadena, Los Angeles, North Hollywood, West Hollywood, Sherman Oaks, Studio City, and surrounding areas.
Contact us today for a free estimate!