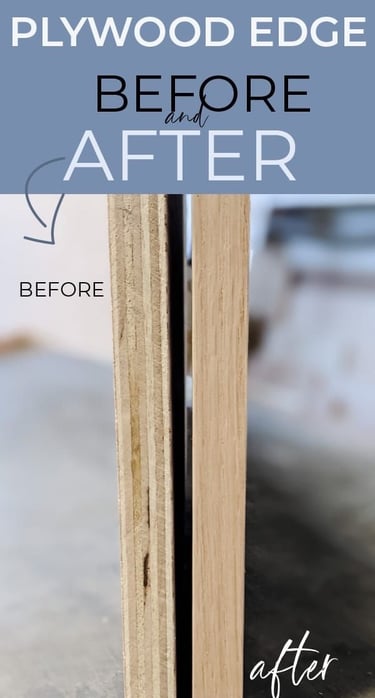
How to Finish Plywood Edges for a Professional Look
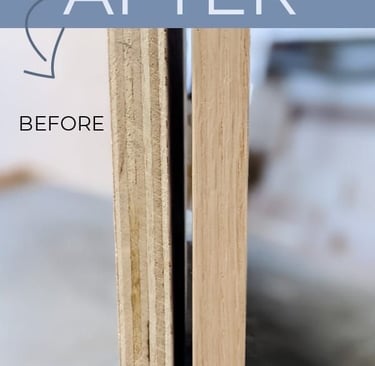
Plywood is a great material for furniture and cabinetry, but its raw edges can look unfinished. To achieve a clean and polished look, you need to properly finish the exposed edges. Here’s how to do it using edge banding, wood filler, or solid wood strips.
ARTICLES
3/12/20252 min read
Why Finish Plywood Edges?
Enhances Appearance – Covers the rough, layered look of raw plywood.
Increases Durability – Sealed edges prevent chipping and moisture damage.
Smooth Finish for Painting or Staining – Provides a seamless look for paint or stain applications.
Professional-Quality Furniture – Essential for cabinetry, shelves, and tabletops.
Methods to Finish Plywood Edges
1. Edge Banding (Best for Quick and Clean Finishing)
Best for: Cabinets, shelves, furniture, and projects requiring a natural wood look.
Materials Needed:
Iron-on or self-adhesive edge banding (wood veneer or PVC)
Household iron or edge banding tool
Utility knife or edge trimmer
Sandpaper (220 grit)
Steps:
Cut the edge banding slightly longer than the plywood edge.
Apply heat using an iron to activate the adhesive, pressing firmly along the surface.
Trim excess banding with a utility knife or edge trimmer.
Lightly sand the edges for a seamless finish.
2. Wood Filler (Best for Painting Over the Edges)
Best for: Painted projects where edge banding is unnecessary.
Materials Needed:
High-quality wood filler
Putty knife
Sandpaper (120-220 grit)
Paint or primer
Steps:
Apply wood filler along the plywood edge using a putty knife.
Let it dry completely before sanding smooth.
Prime and paint over the surface for a flawless finish.
3. Solid Wood Strips (Best for Durability and Strength)
Best for: Heavy-duty furniture, tabletops, and projects needing extra durability.
Materials Needed:
Solid wood strips (same species as plywood)
Wood glue
Clamps
Sandpaper (220 grit)
Finish nails (optional for extra hold)
Steps:
Cut solid wood strips to the same length and width as the plywood edge.
Apply wood glue to the edge and press the strip firmly into place.
Use clamps to hold it until dry. Secure with finish nails if necessary.
Sand and stain or paint for a uniform look.
Choosing the Best Method for Your Project
Edge Banding: Best for modern furniture, cabinets, and shelves. Easy to apply with moderate durability.
Wood Filler: Ideal for painted furniture and quick DIY projects. Very easy to use but offers lower durability.
Solid Wood Strips: Perfect for high-end furniture and tabletops. Requires more effort but provides the highest durability.
Pro Tips for a Flawless Finish
Always sand plywood edges before applying any finishing method.
Match wood filler or edge banding color to your plywood for a natural look.
Use fine-grit sandpaper for a smooth and seamless transition.
Seal plywood edges with a clear coat for extra moisture protection.
Need Professional Help?
Want a flawless plywood finish without the hassle? ProHands Handyman offers expert woodworking and finishing services to ensure a high-quality, professional look.
📞 Call or text: 818-401-7766
📍 Serving Glendale, Burbank, Pasadena, Los Angeles, North Hollywood, West Hollywood, Sherman Oaks, Studio City, and surrounding areas.
Contact us today for a free estimate!