How to Build a Platform Deck on the Ground
Building a platform deck on the ground is an excellent way to create an outdoor living space for relaxing, dining, or entertaining. Whether you want a cozy spot for morning coffee or a spacious area for summer barbecues, a platform deck can transform your backyard. Here’s a step-by-step guide on how to build a beautiful and functional platform deck on a budget.
ARTICLES
2/23/20252 min read
1. Planning and Design
Before you start building, take the time to plan and design your platform deck:
Determine the Size and Location: Choose a flat area in your yard with proper drainage. Consider the size based on your needs and available space.
Check Local Building Codes: In many areas, a ground-level deck may not require a permit, but it’s always best to check with local authorities.
Choose Your Materials: Pressure-treated lumber is a cost-effective and durable choice. You can also use composite decking for a low-maintenance option.
2. Gather Your Materials and Tools
To build a platform deck, you’ll need the following materials and tools:
Materials:
Pressure-treated lumber (for frame and decking boards)
Gravel (for drainage and base leveling)
Concrete deck blocks (to support the frame)
Galvanized screws and decking fasteners
Weed barrier fabric (to prevent grass and weeds)
Tools:
Circular saw and drill
Level and measuring tape
Shovel and rake
Rubber mallet
3. Prepare the Site
Proper site preparation is essential for a stable and long-lasting deck:
Clear the Area: Remove grass, rocks, and debris from the area where the deck will be installed.
Level the Ground: Use a rake to level the soil, creating a flat surface.
Add a Gravel Base: Spread a 2-3 inch layer of gravel to enhance drainage and prevent the deck from shifting.
Lay Weed Barrier Fabric: Place weed barrier fabric over the gravel to prevent weed growth under the deck.
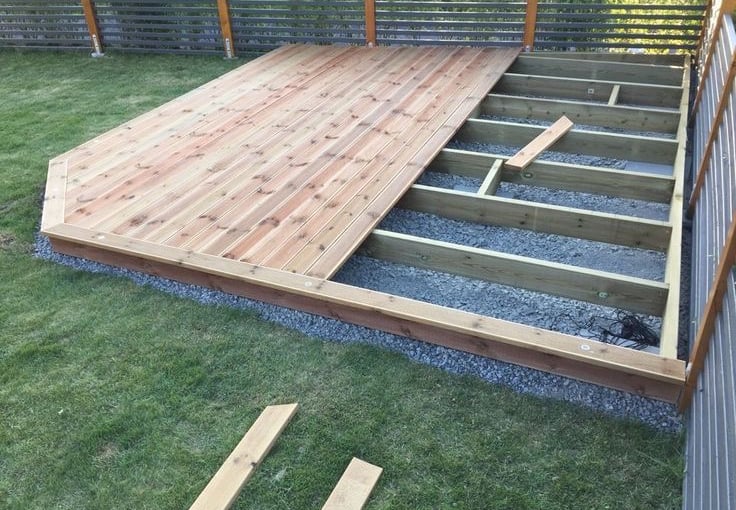
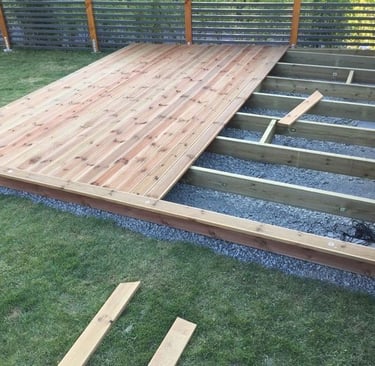
4. Build the Deck Frame
The frame is the foundation of your platform deck:
Lay Out the Frame: Arrange pressure-treated lumber on top of the deck blocks to form the perimeter of the deck. Ensure it’s level and square.
Secure the Joists: Attach the joists to the frame, spacing them 16 inches apart for support.
Check for Level: Use a level to ensure the frame is even before securing it in place.
5. Install the Decking Boards
Once the frame is complete, it’s time to add the decking boards:
Start from One Side: Begin installing the decking boards from one side of the deck, leaving a small gap between each board for drainage.
Secure with Decking Screws: Use galvanized screws or decking fasteners to secure the boards to the frame.
Trim the Edges: Once all boards are installed, trim the edges for a clean and uniform appearance.
6. Finishing Touches
Sand and Seal: Sand any rough edges and apply a weather-resistant sealant to protect the wood from the elements.
Add Railings (Optional): If desired, add railings for safety and style.
Decorate and Enjoy: Furnish your new deck with outdoor furniture and accessories to create a cozy, inviting space.
Need Professional Help?
Building a platform deck can be a rewarding DIY project, but it requires time, tools, and skill. If you want a professionally built deck without the hassle, contact ProHands Handyman. Our team provides expert deck construction services to enhance your outdoor living space.
📞 Call or text: 818-401-7766
📍 Serving Glendale, Burbank, Pasadena, and surrounding areas.
Transform your backyard today—reach out for a free estimate!